
Don’t miss that shot! 10 important tips for photographing aurora borealis
Camera? Check. Gloves? Check. Tips for photographing aurora borealis? Double check.
Planning to capture some once-in-a-lifetime shots on your aurora hunt? Don’t head out without these tips for photographing aurora borealis!
Seeing the lights in person is one thing, but being able to revisit that memory is priceless. Here are some of the tips and tricks that we use when setting up for a night of astrophotography. Share some of yours in the comments!
1. Keep your image sharp with a tripod
It can be hard to tell, but we move a lot. Try taking a few photos on a long shutter and you’ll see how much. In order to achieve a crisp and unblurred image, you’ll need a tripod or a solid surface to set your camera on for the duration of its shutter process.
Tripods are the best option. Because you never know when you’ll get a flat enough rock at the right height. (Not to mention the wind! A brisk evening wind has taken out many an expensive camera- so make sure yours is both attached and weighted enough to be left alone!
And if your images still suffer from shake, try a remote shutter release, or set a 10-second timer. You’d be surprised how disruptive one shutter press can be!)
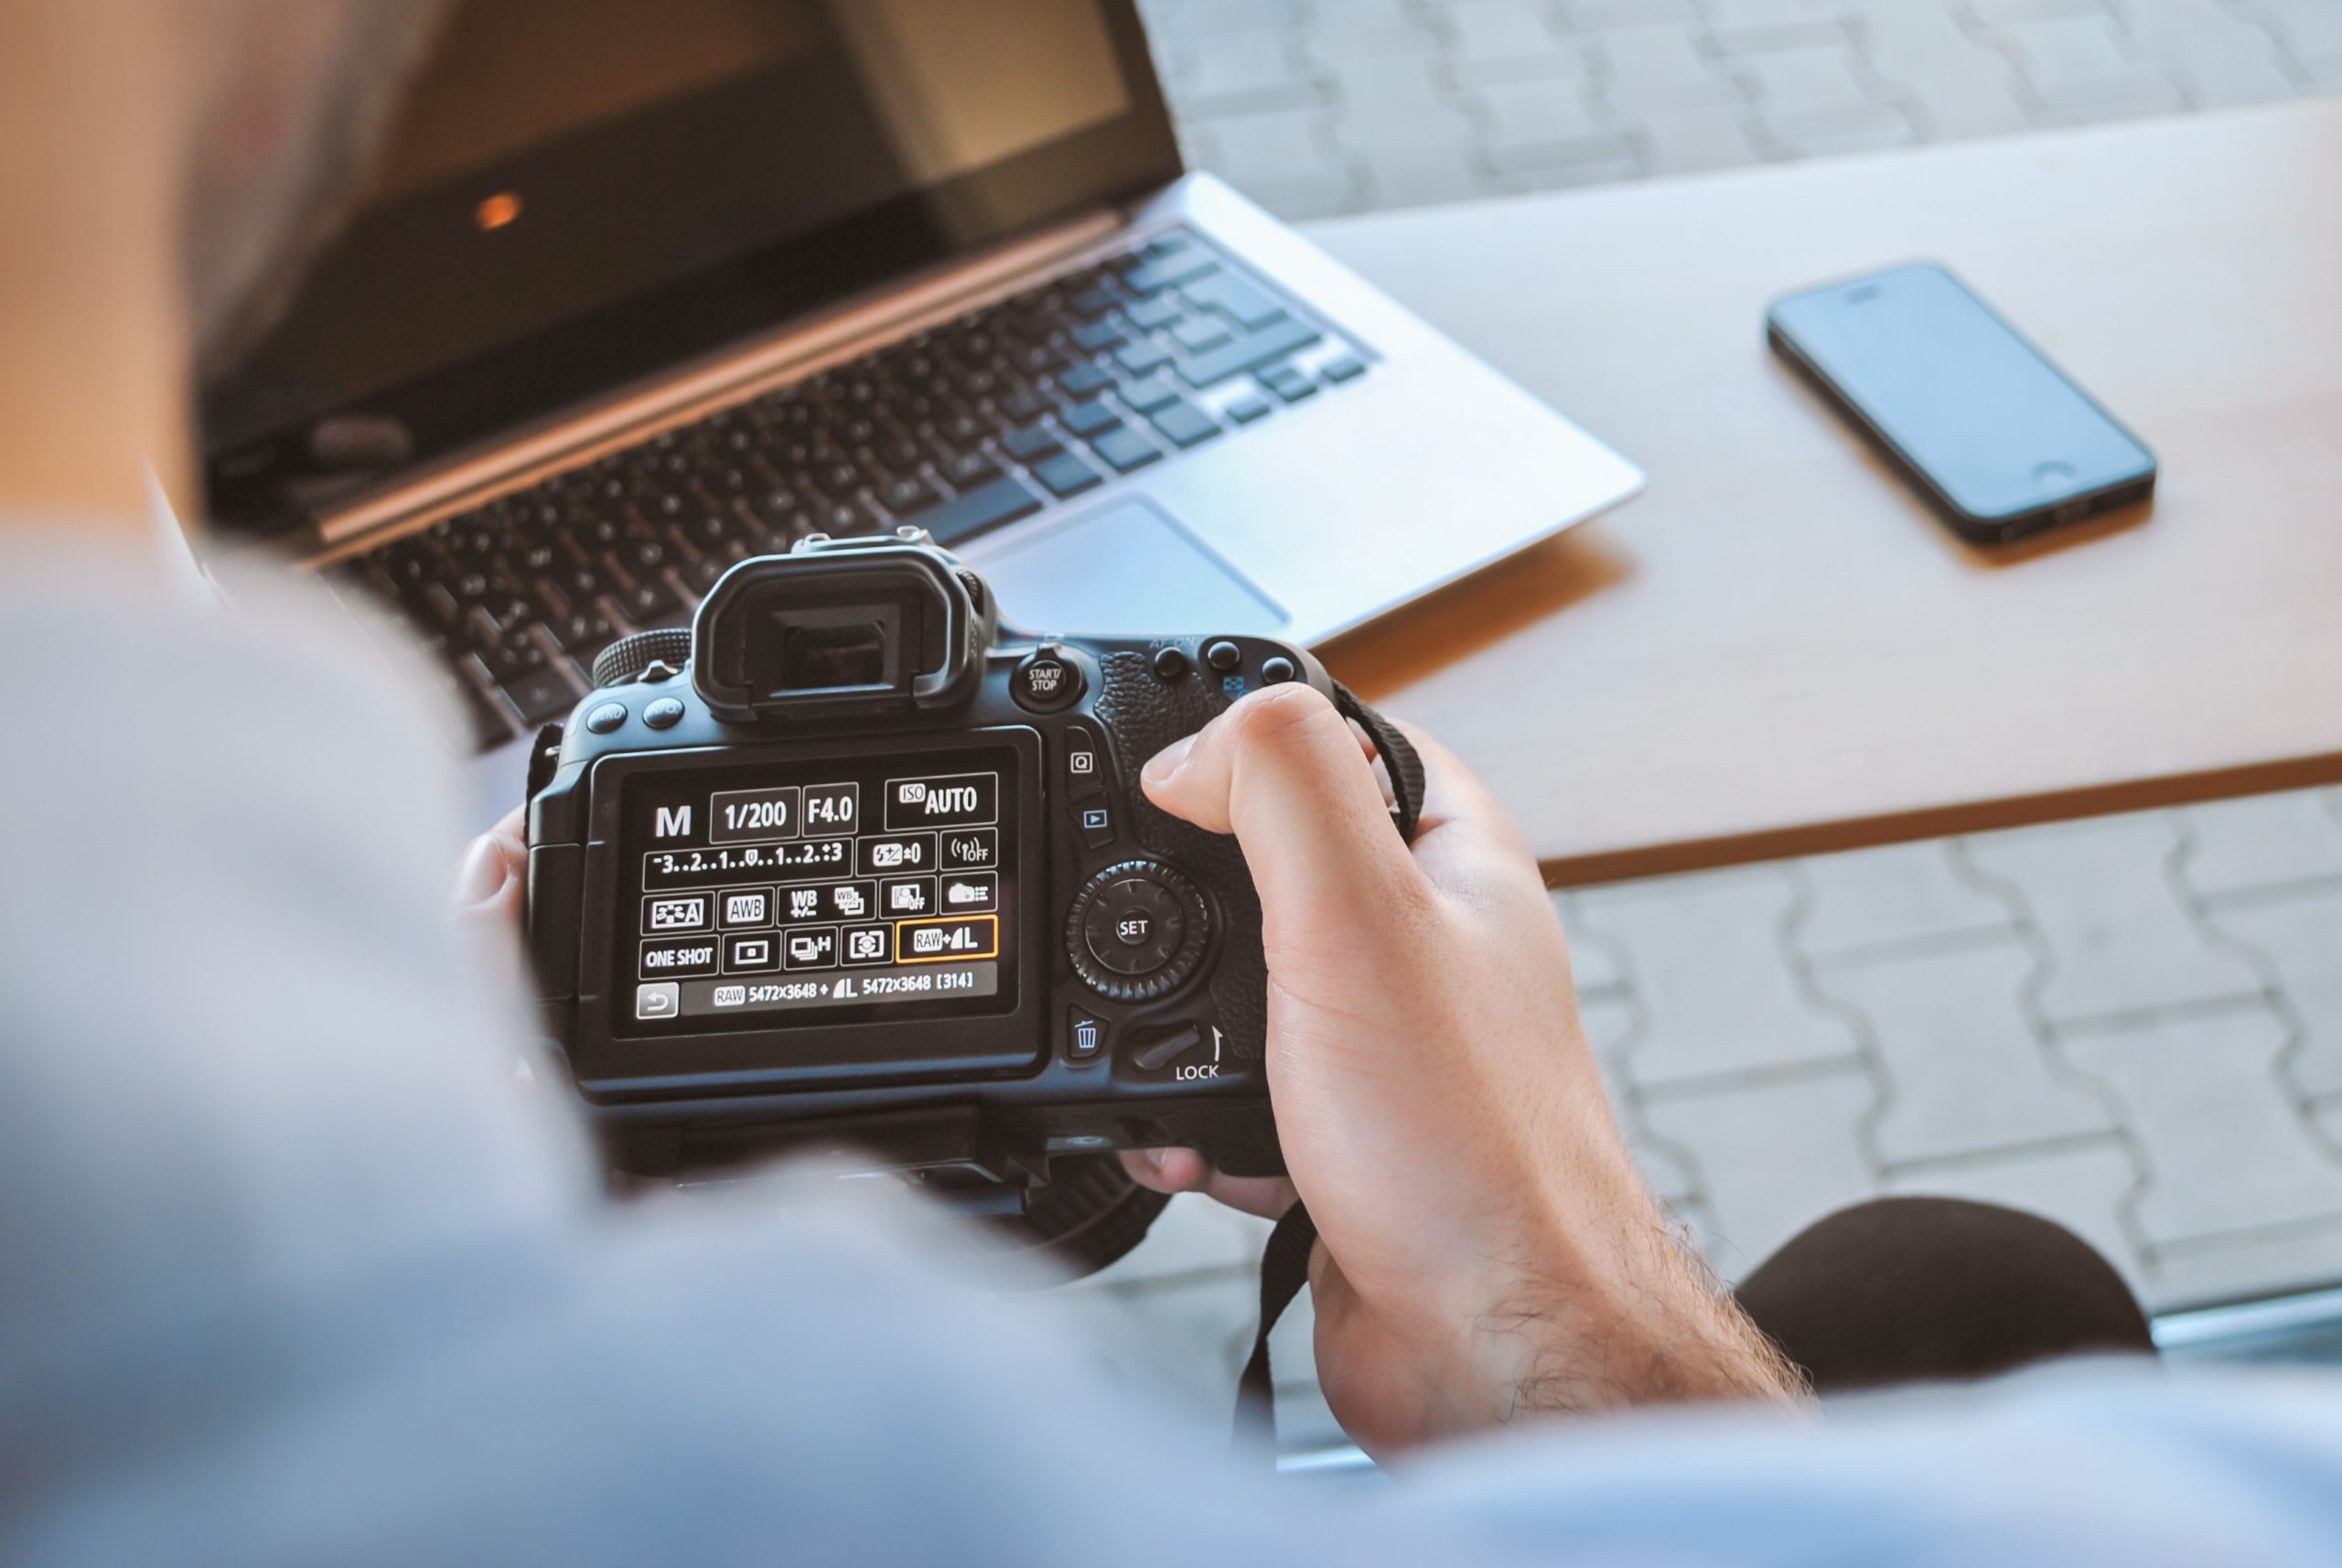
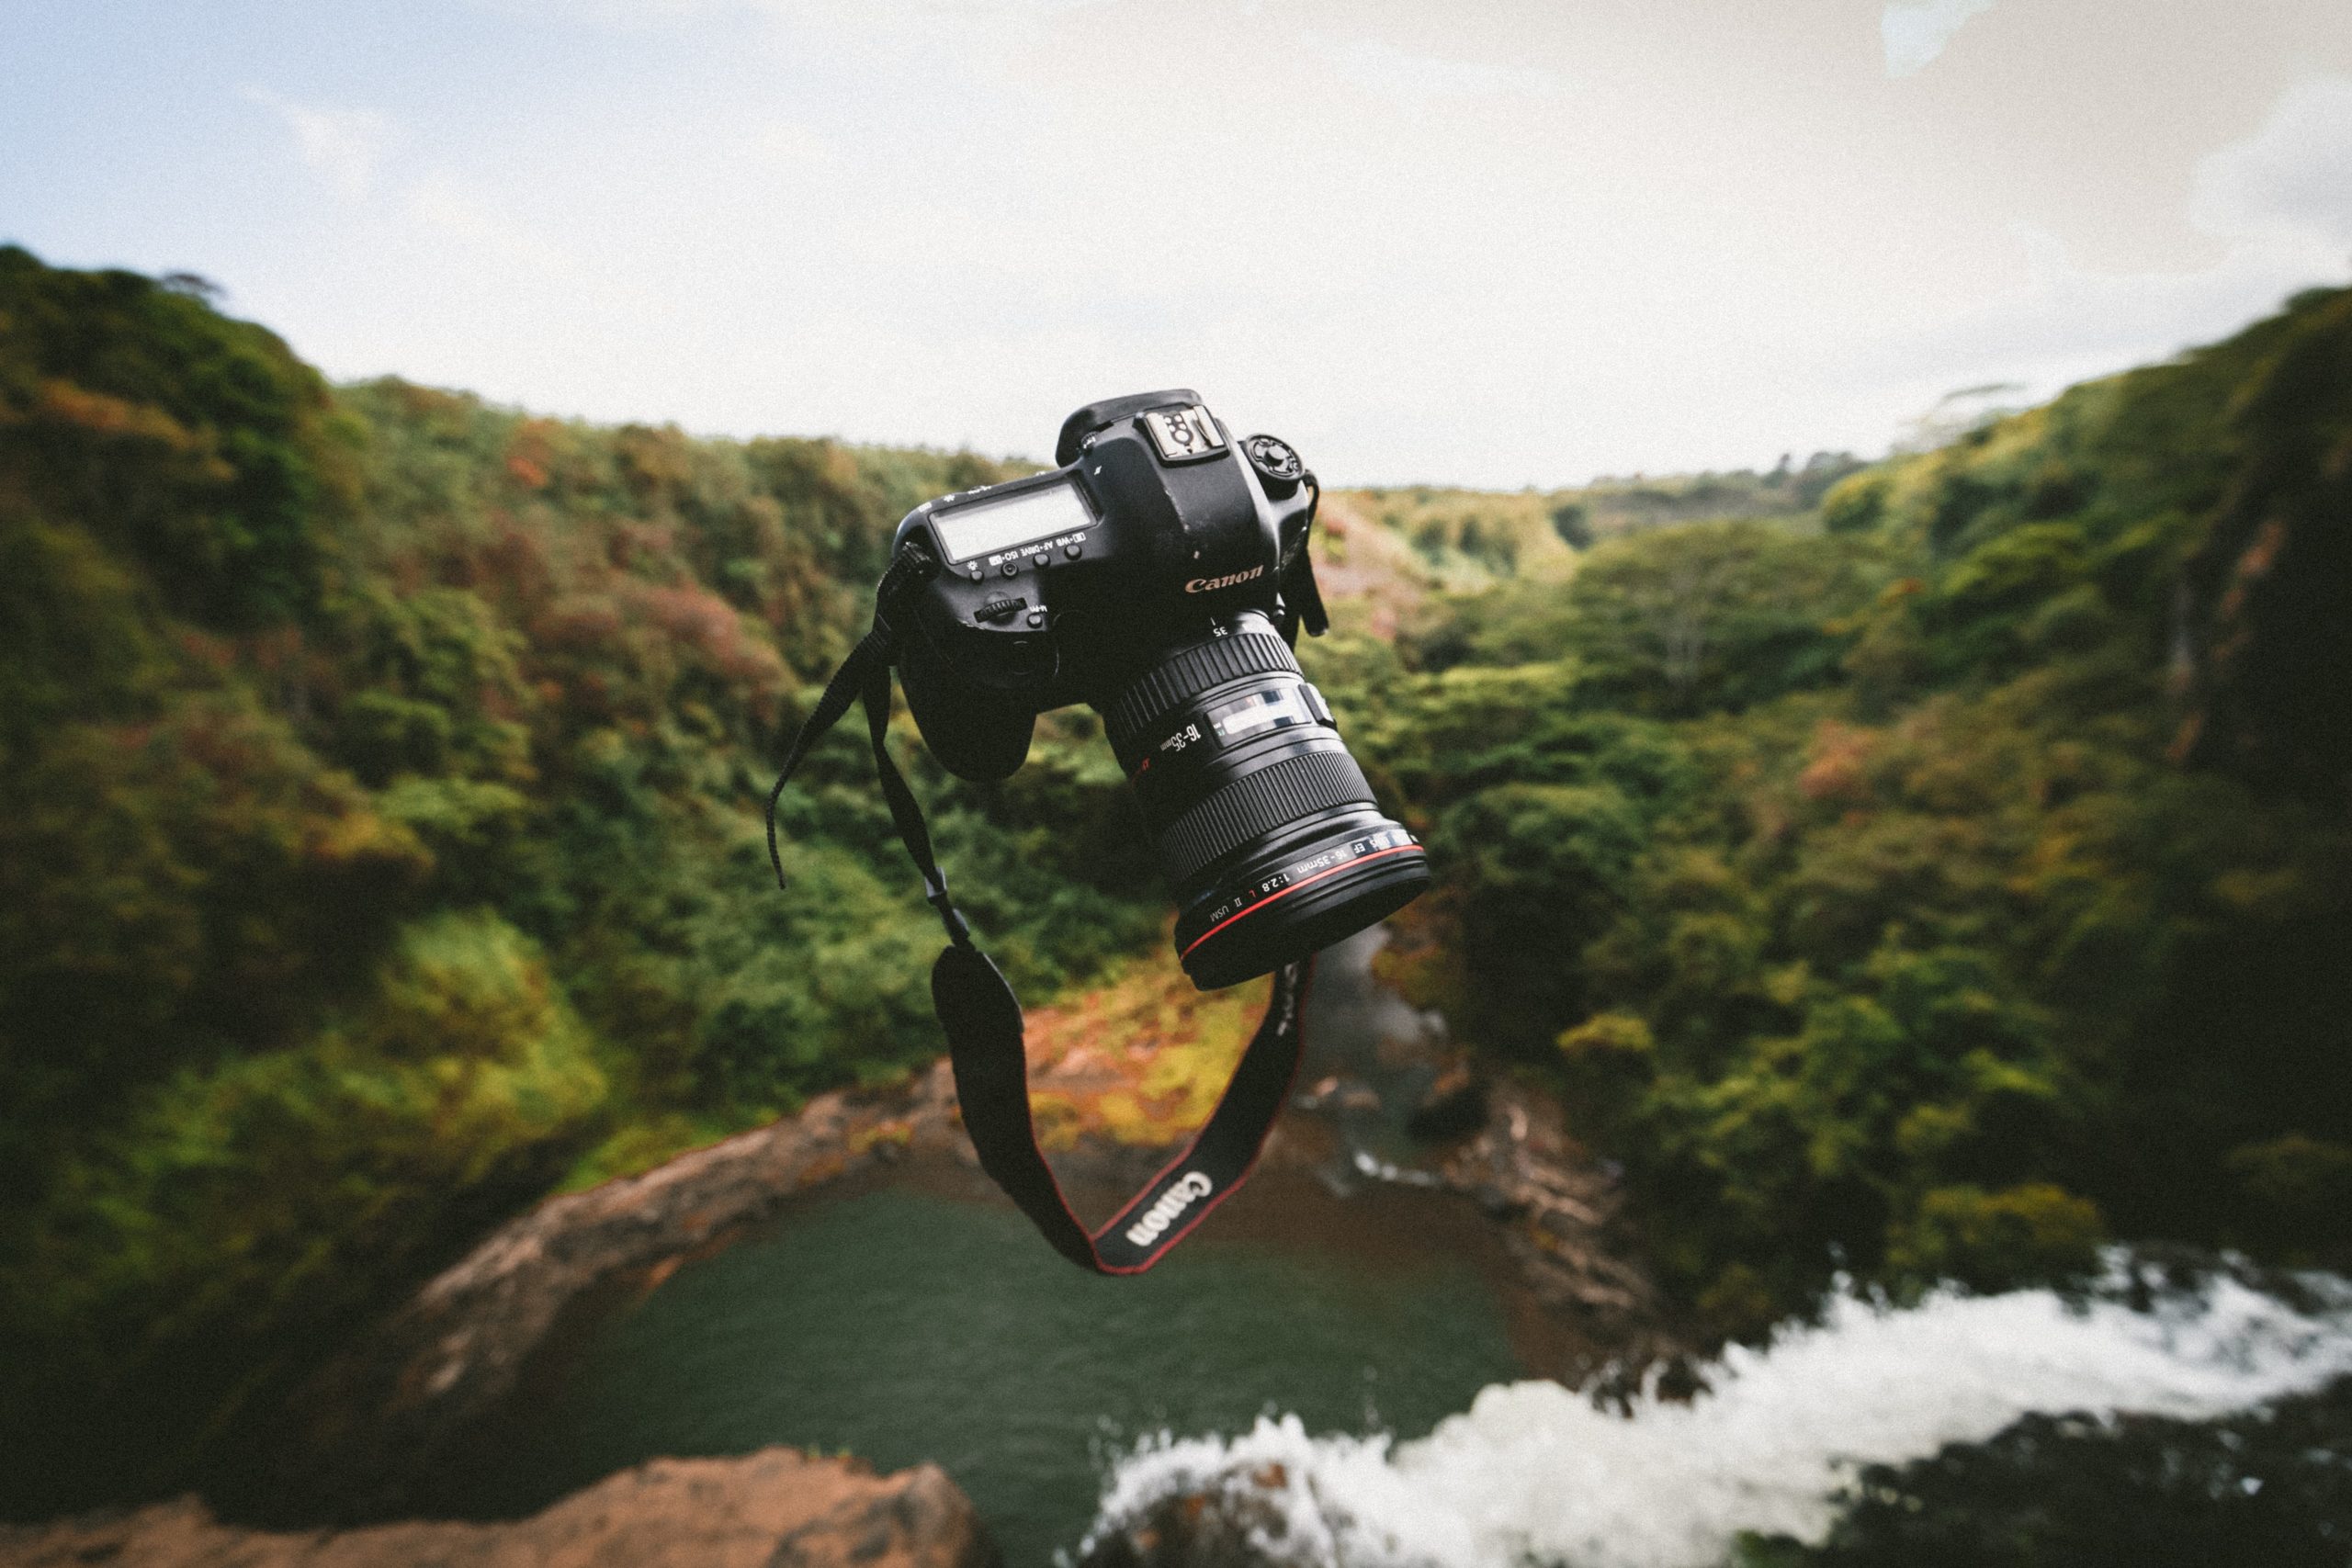
2. Check for manual mode
When you’re heading out on your first aurora excursion, make sure you have the right gear for the job. Many first-time hunters make the mistake of bringing cameras that don’t have a manual capability or a way to adjust settings.
Things like disposable cameras and many lower-level point and shoot varieties function on pre-created settings that don’t allow for much tweaking if any. These settings are most often intended for specific contexts like traditional daytime sunlight and indoor lighting.
You may find that you have limited control over novelty gear and smartphones as well, so it is good to check beforehand to make sure you know what you’re working with. Popular options for aurora photography are SLR and DSLR cameras with a manual mode, and as technology develops- even some smartphones and drones.
Many of the newer smartphones have night mode settings and are only getting better. But till then- it’s hard to beat good old-fashioned manual mode, which gives you full control over your image and how you capture the light around you.
3. Do your business before you leave the house
If you’re just starting out, get familiar with your camera settings before you leave. Finding an unfamiliar button or dial in the dark can be a struggle, especially if there’s an aurora actively happening overhead.
You can set and test basic settings (shutter speed, ISO, aperture, etc) before you head out, giving yourself just one less thing to do in the field, and a chance to troubleshoot any problems.
Keep in mind though, that a good understanding of these settings is helpful as you may have to adjust them based on what conditions you’re seeing. (Oh. And do use the facilities before you go- you never know when you’ll see another bathroom out in the wilds of nighttime Iceland.)
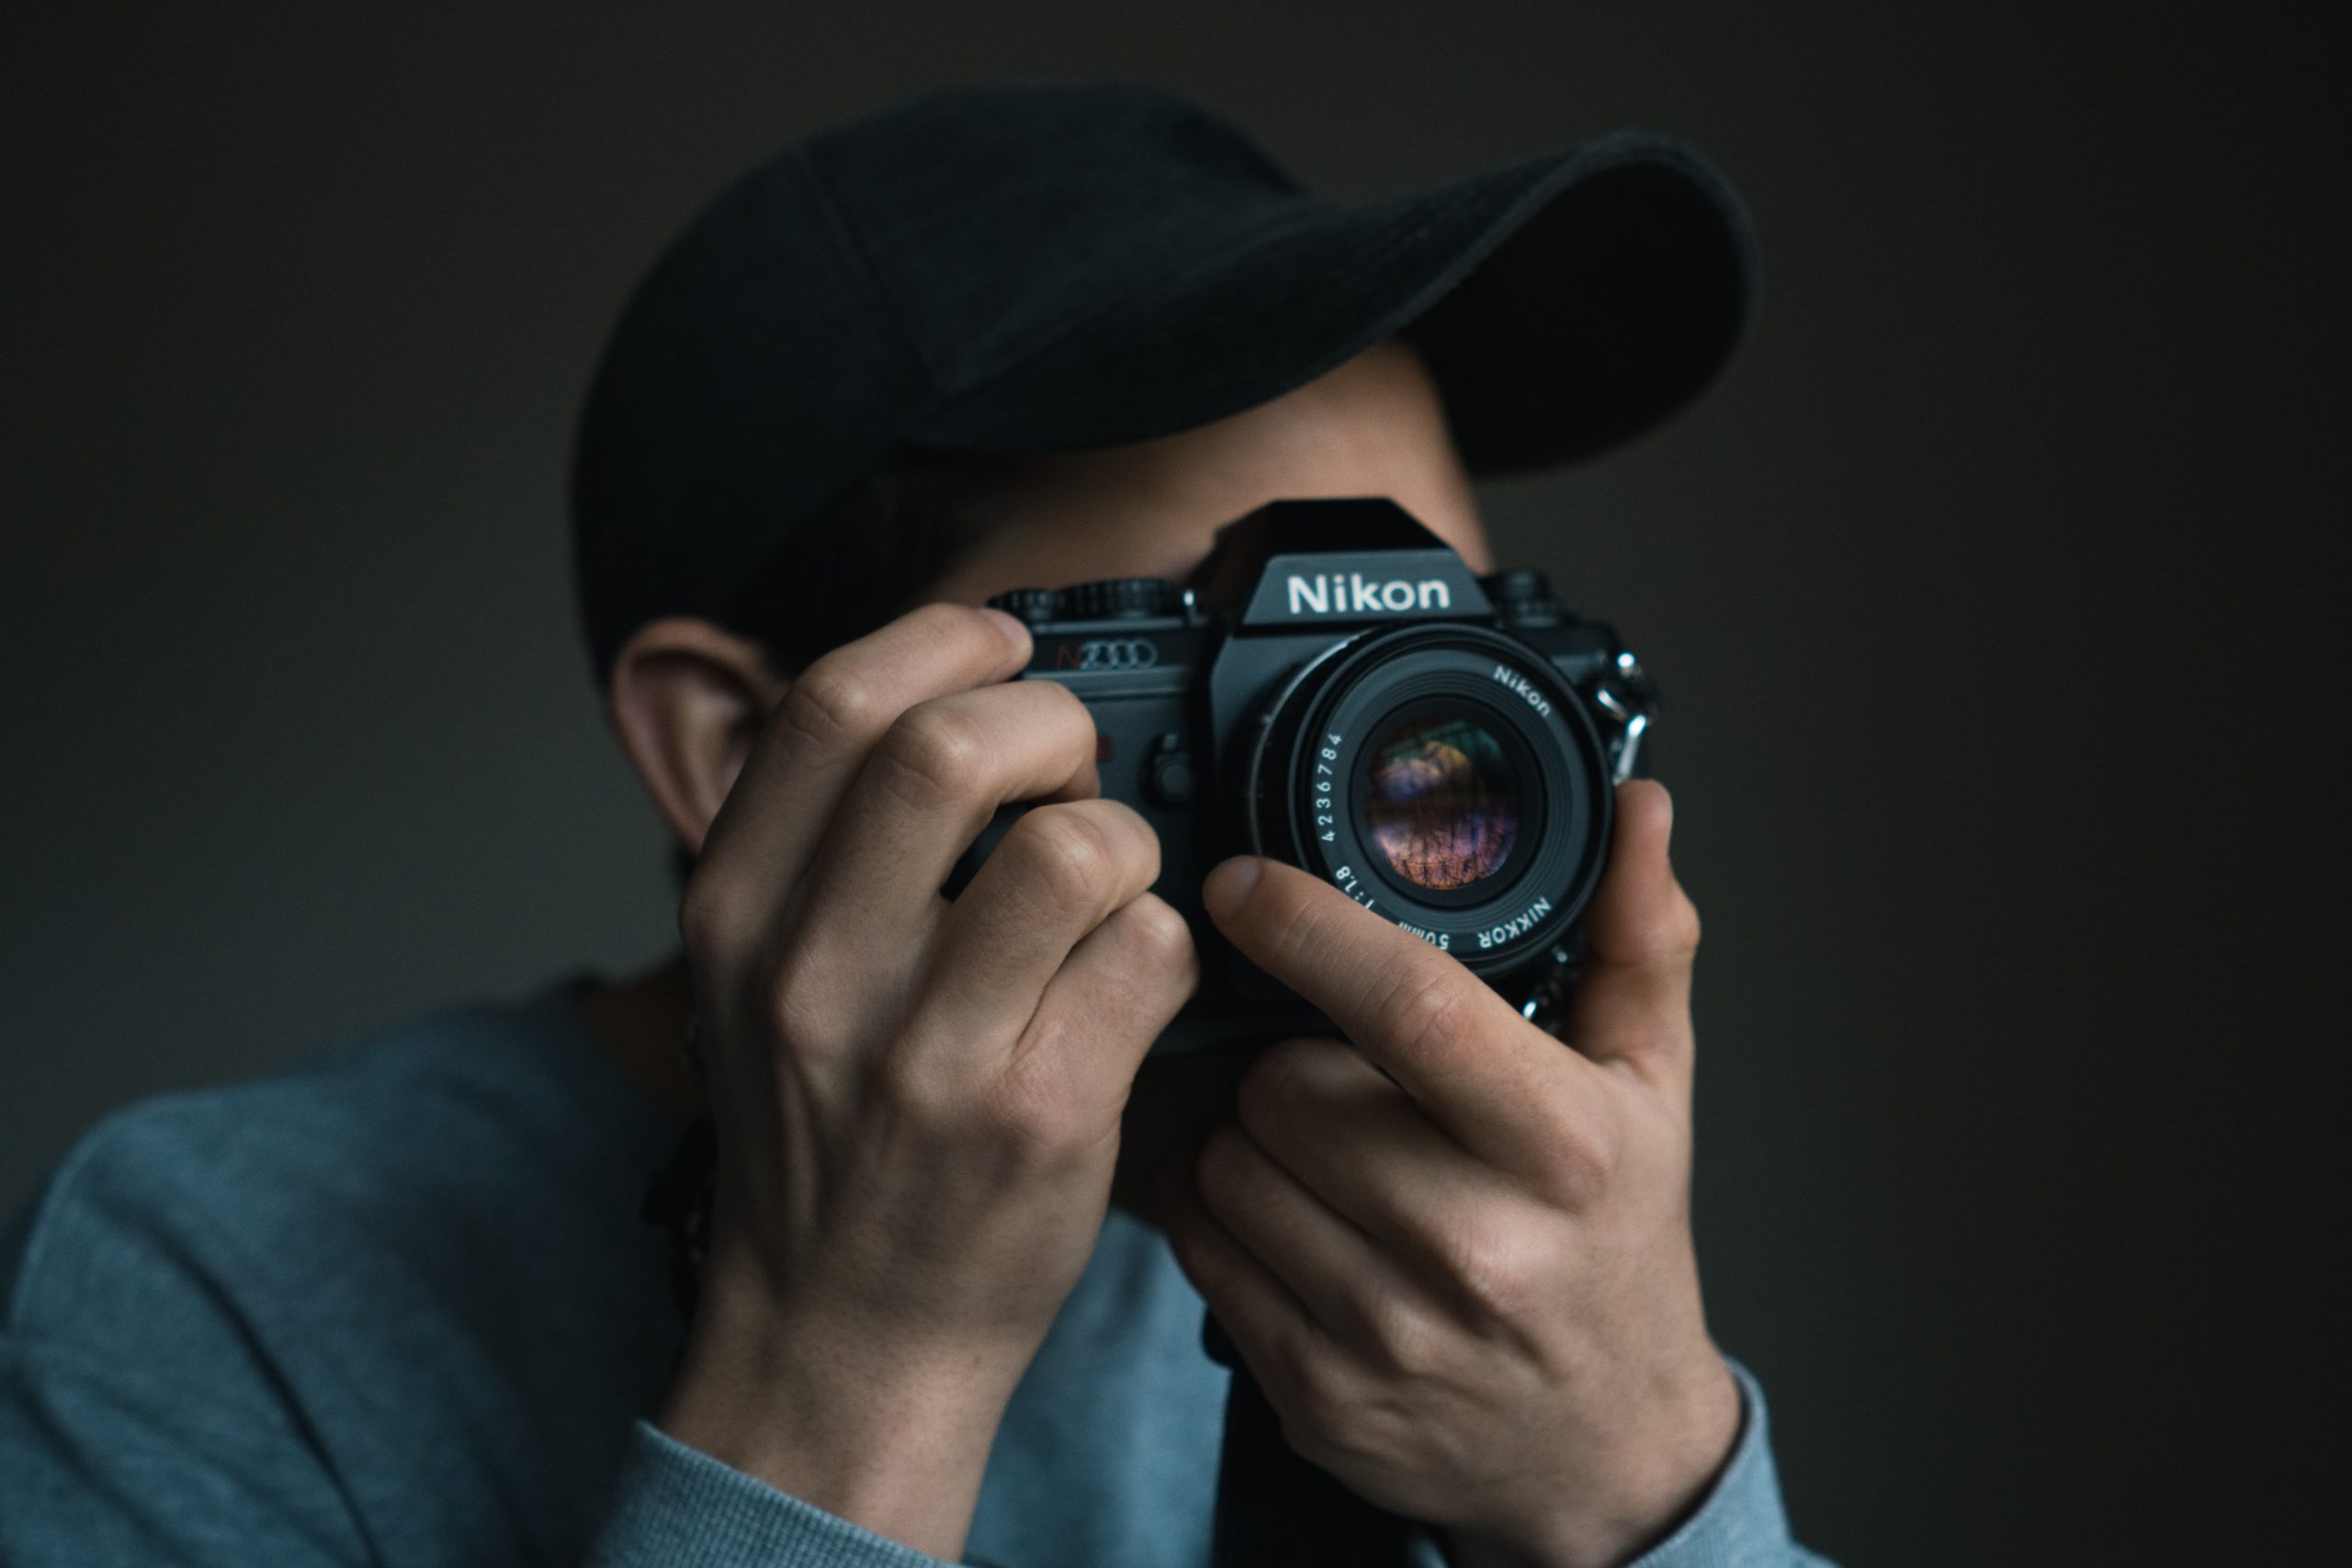
4. Get focused
You already know to put the camera in a manual setting, but what about your lens?
The autofocus function works really well during the day, but at night the camera will struggle to use this tool. Picture it- you’re all set up, there’s a glorious display of northern lights, you’ve pressed the button, and.. The lens is just grinding into infinity.
When in autofocus in a dark place the camera isn’t quite sure what to focus on, so it just spins the lens over and over trying to find a subject. So don’t forget to set your camera to manual focus! (..And then to actually focus, using another bright object in the area.)
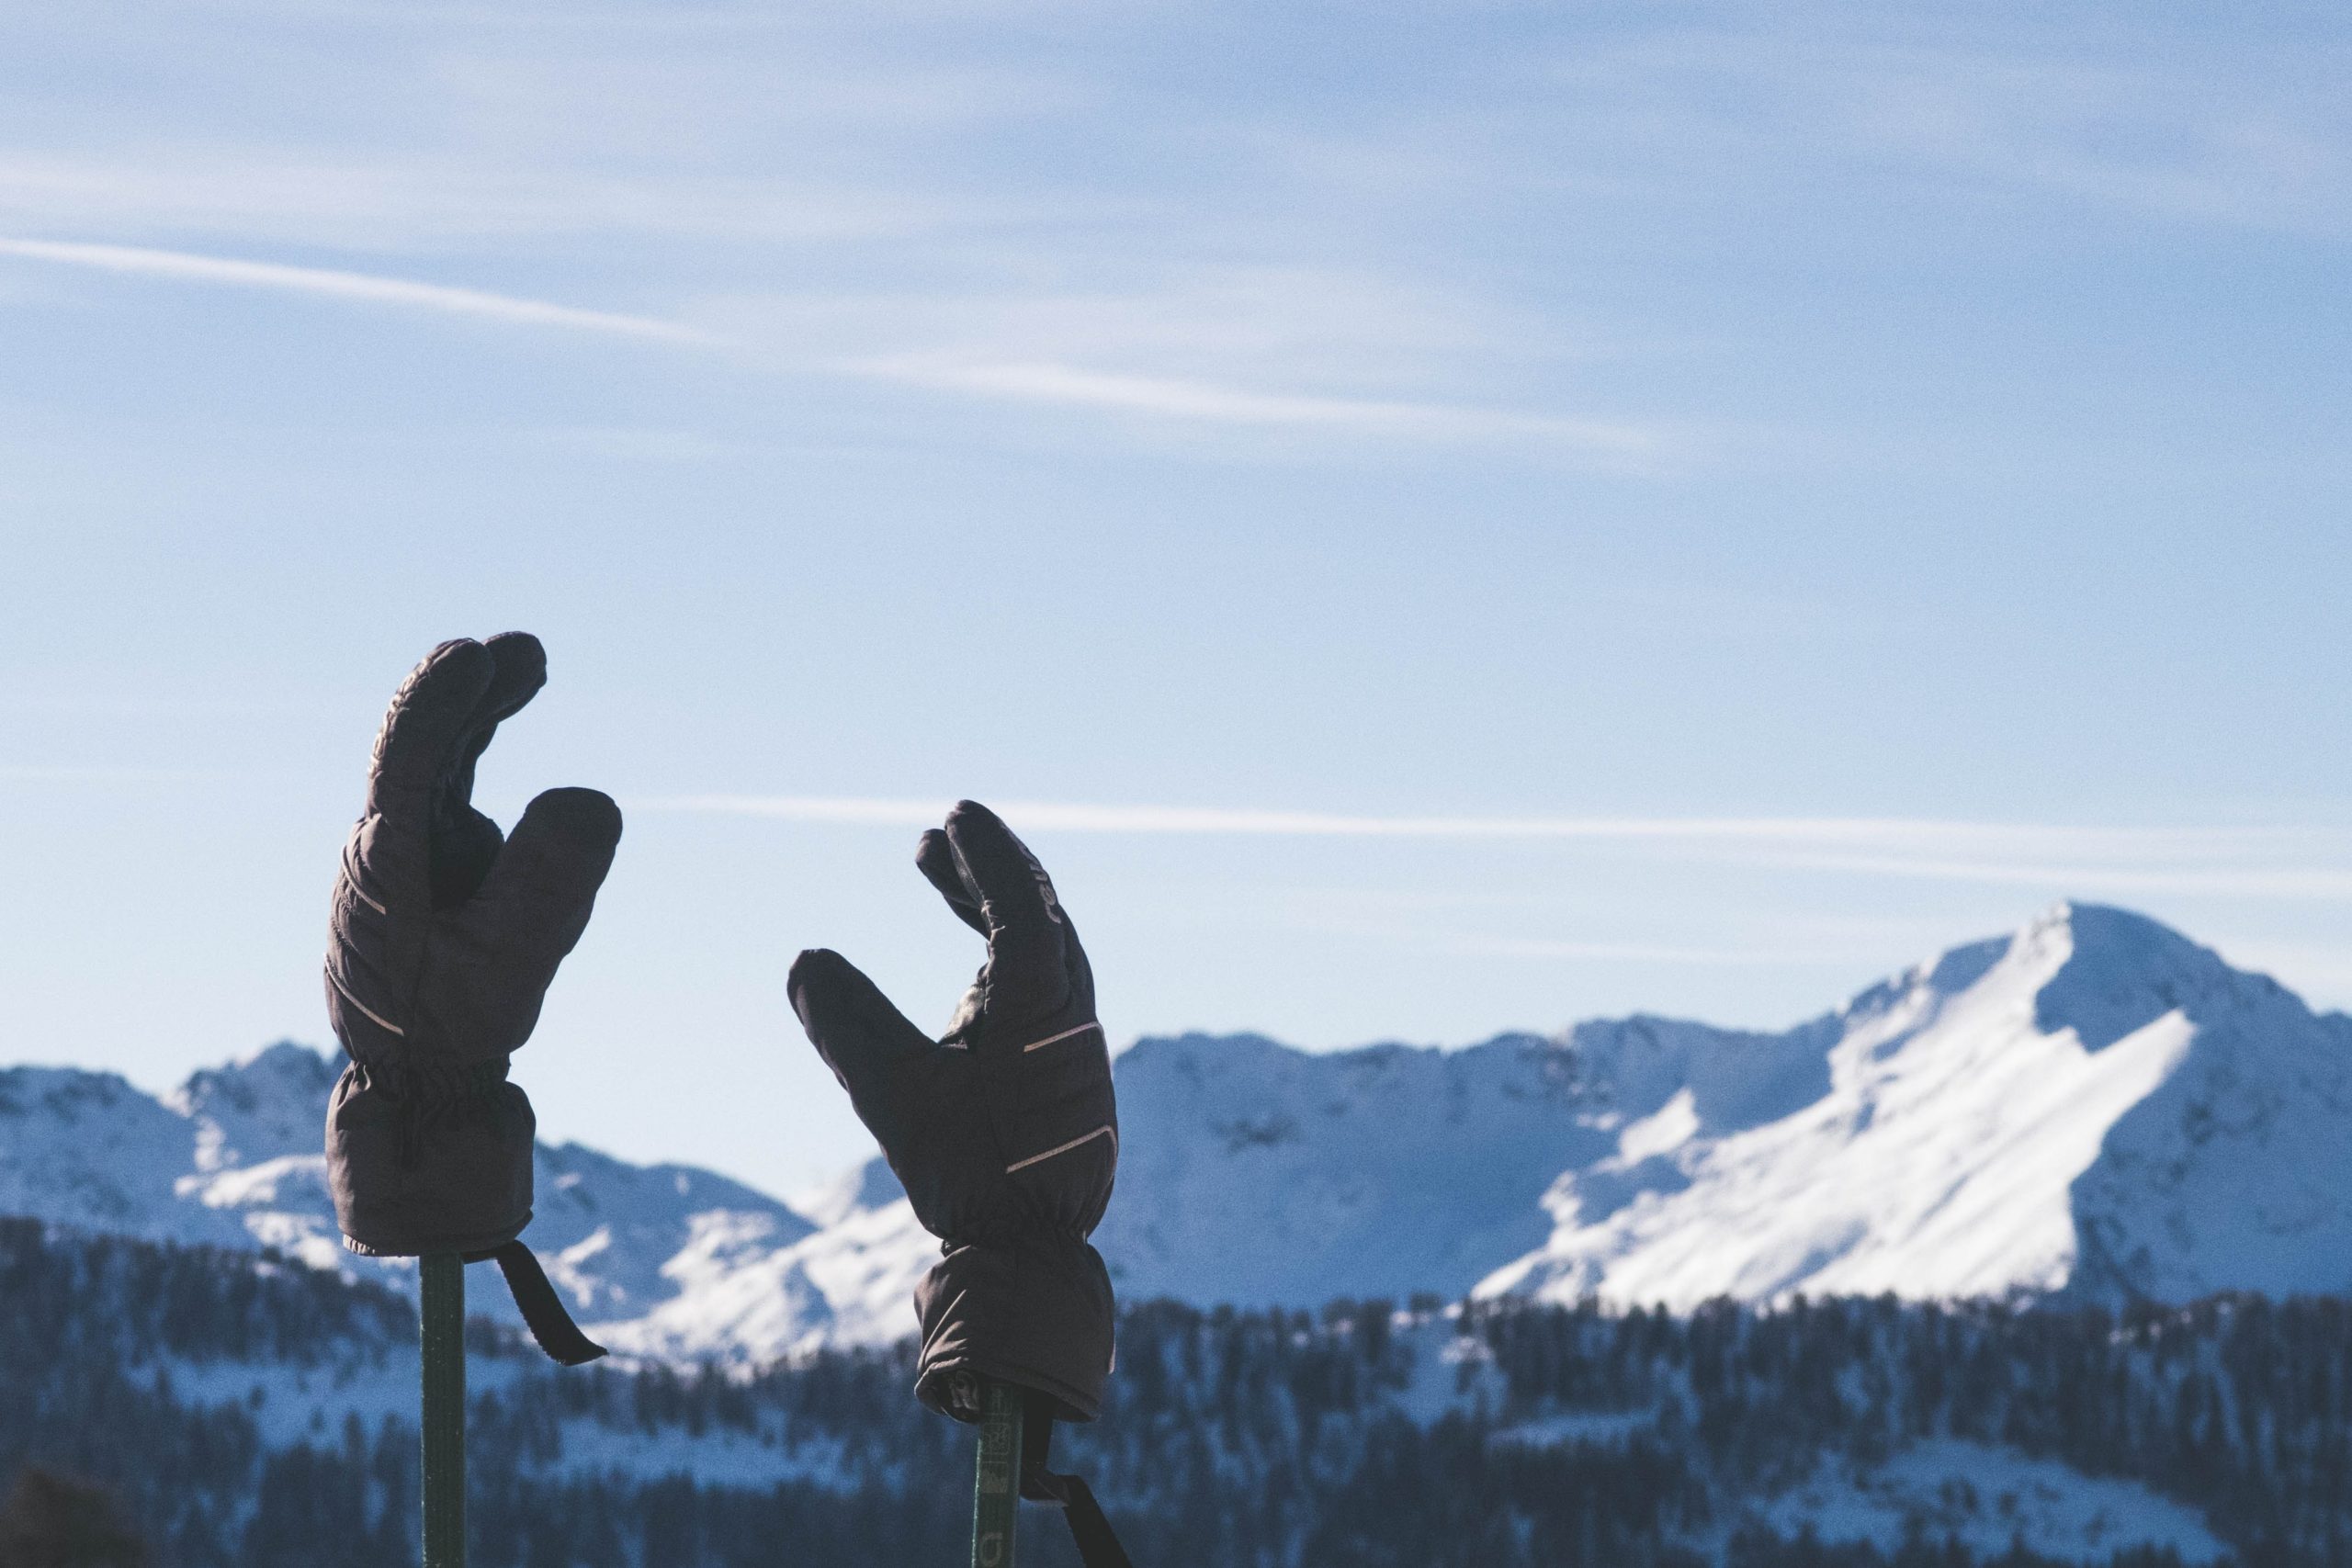
5. Keep your batteries warm
Most cameras are powered by lithium-ion batteries, and lithium-ion batteries don’t do well in the cold. This could spell trouble for your smartphone, your cameras, and even your gadgets or tools.
In order to keep yourself prepared, the best thing to do is to make sure you have fully charged backup batteries on hand. But if it’s too late, you can still salvage the one you’ve got by warming it in your pocket, wearing your gear close to your body, or utilizing hand warmers.
Make sure to not leave your batteries in a cold place overnight, and if you need to do an emergency charge, try to avoid charging a cold battery. You may find that it won’t take the charge!
6. Open it up!
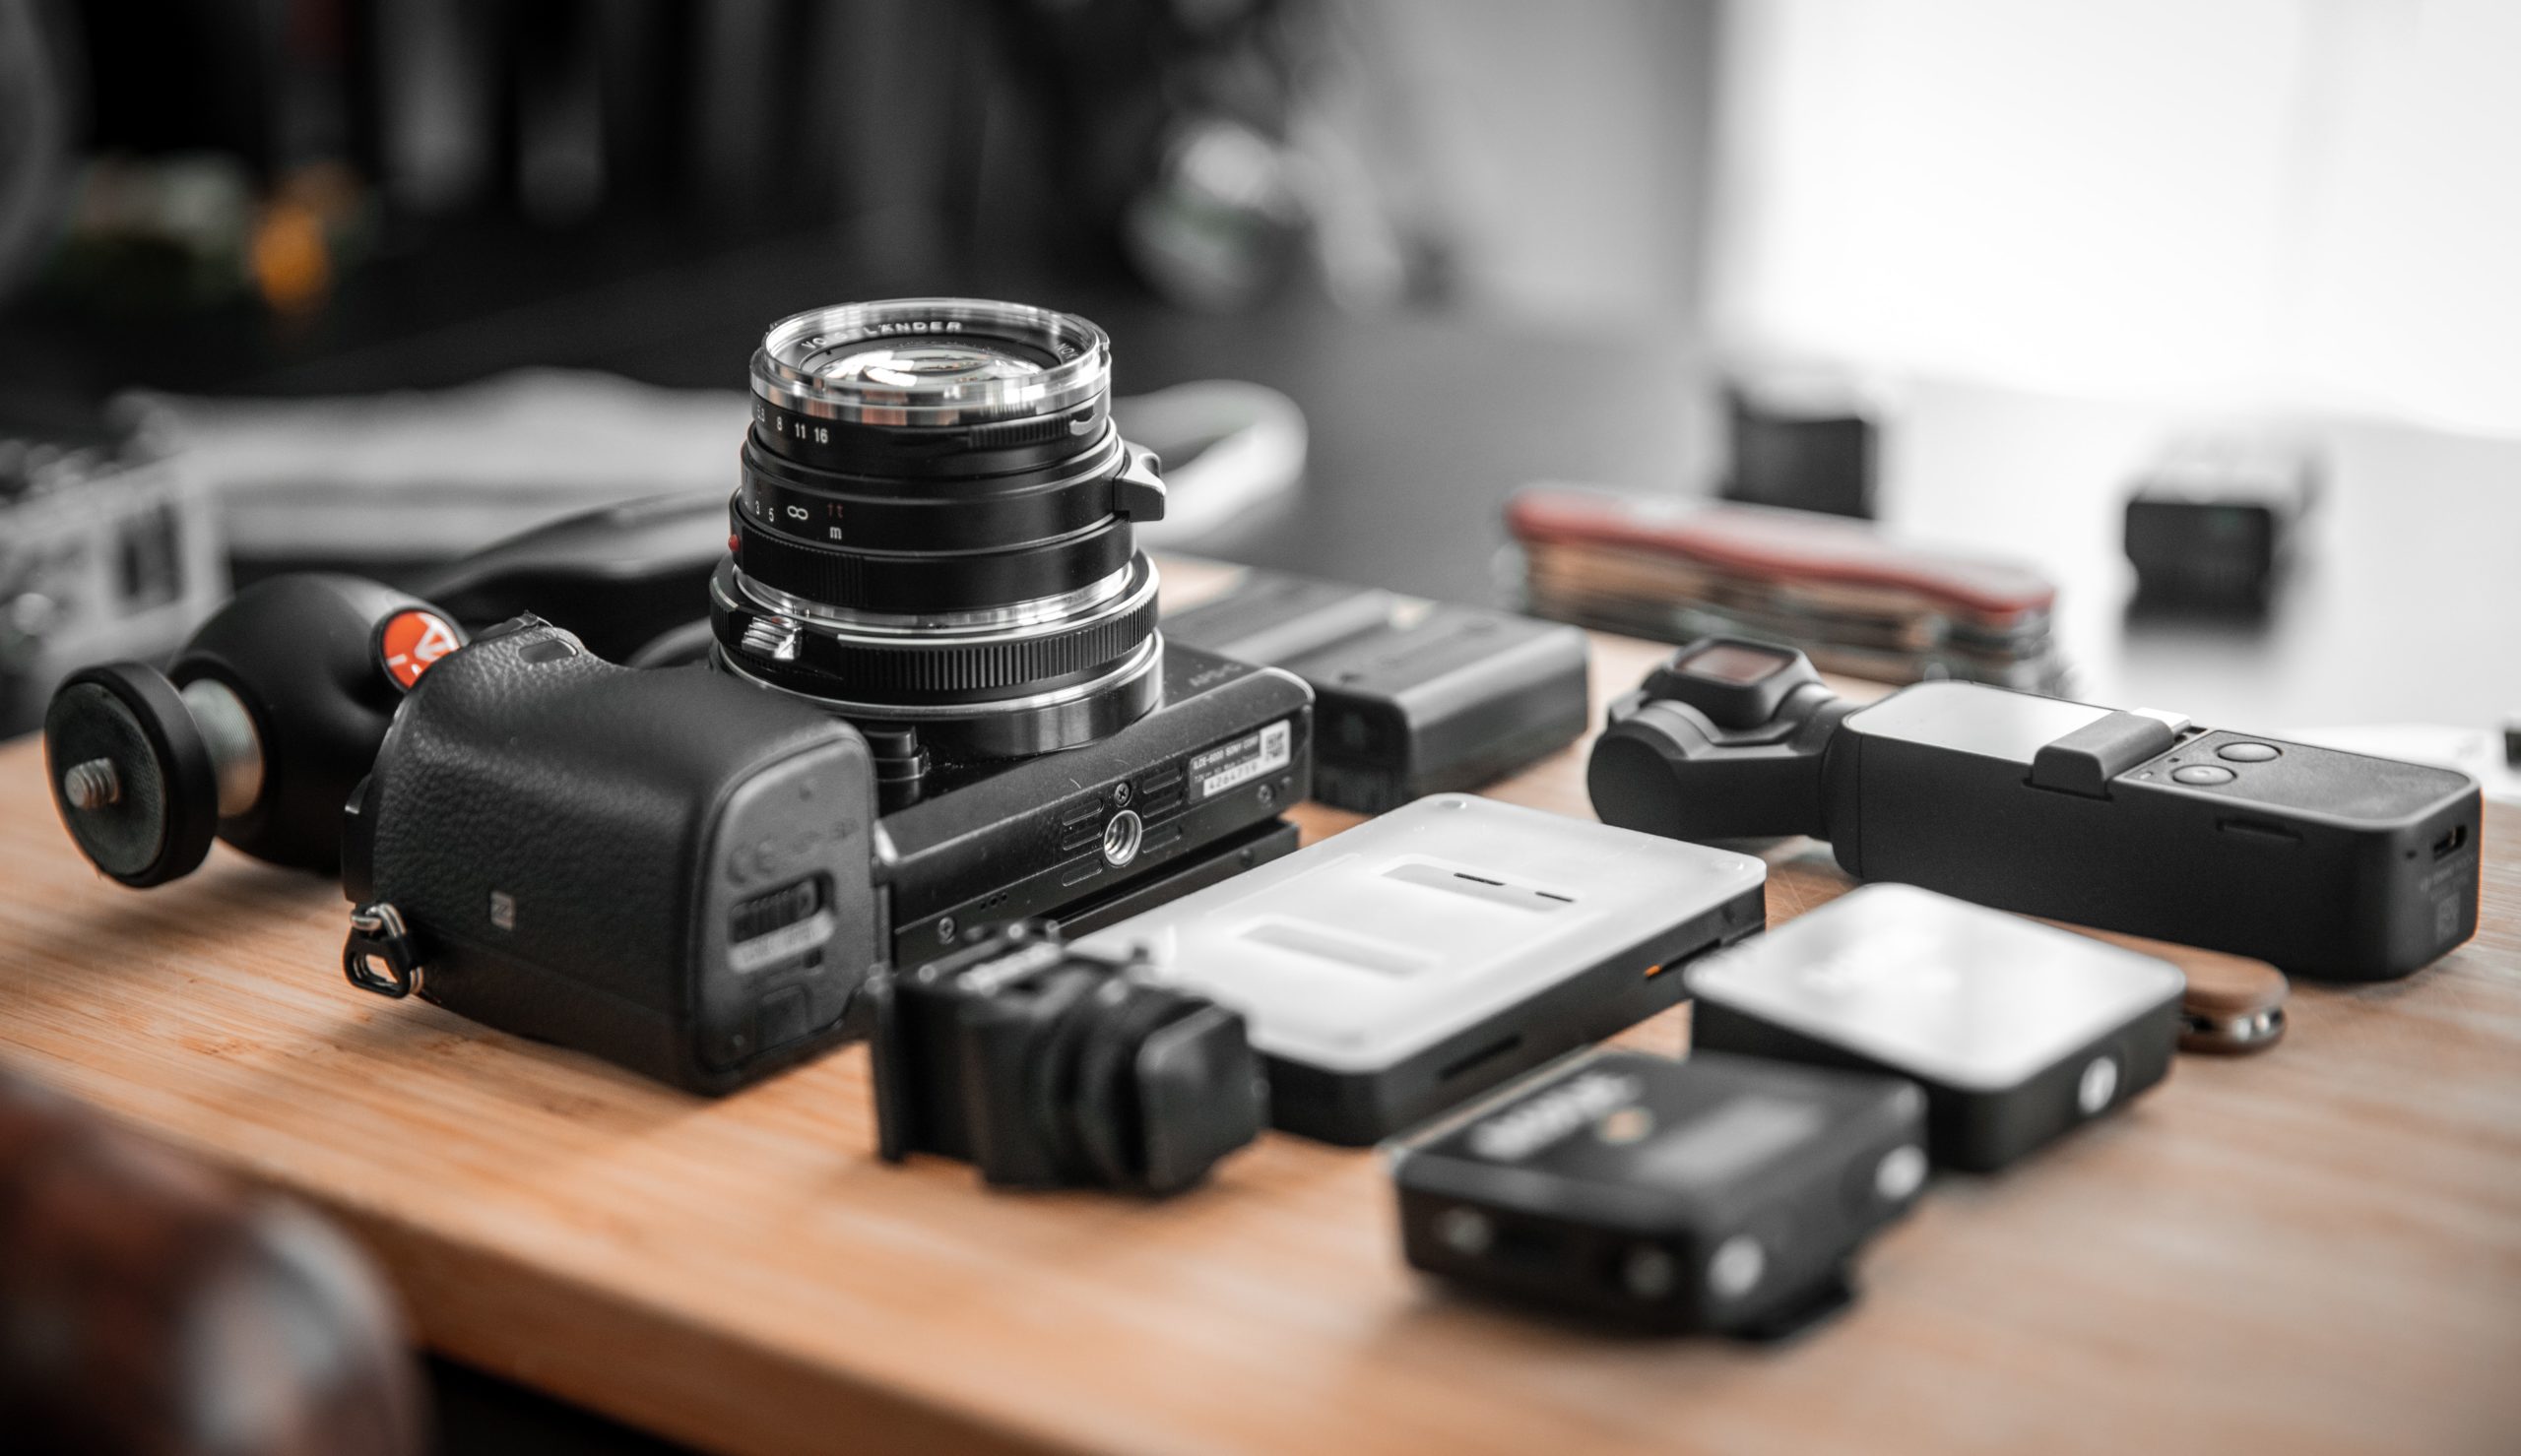
You’re packing your camera bag and making last minute lens decisions- so what are you bringing? Our favorite aurora lenses are fast, wide, luminous and light.
That means that they can access a low digit (fast) aperture, they can capture a wide view of the sky, they aren’t overly heavy, and they manage low light conditions well and without distortion.
Choosing a lens is a big investment, so make sure you’re going with something that works for your camera and will meet your photographic needs. Auroras can take up a huge vista, so when in doubt, go wide!
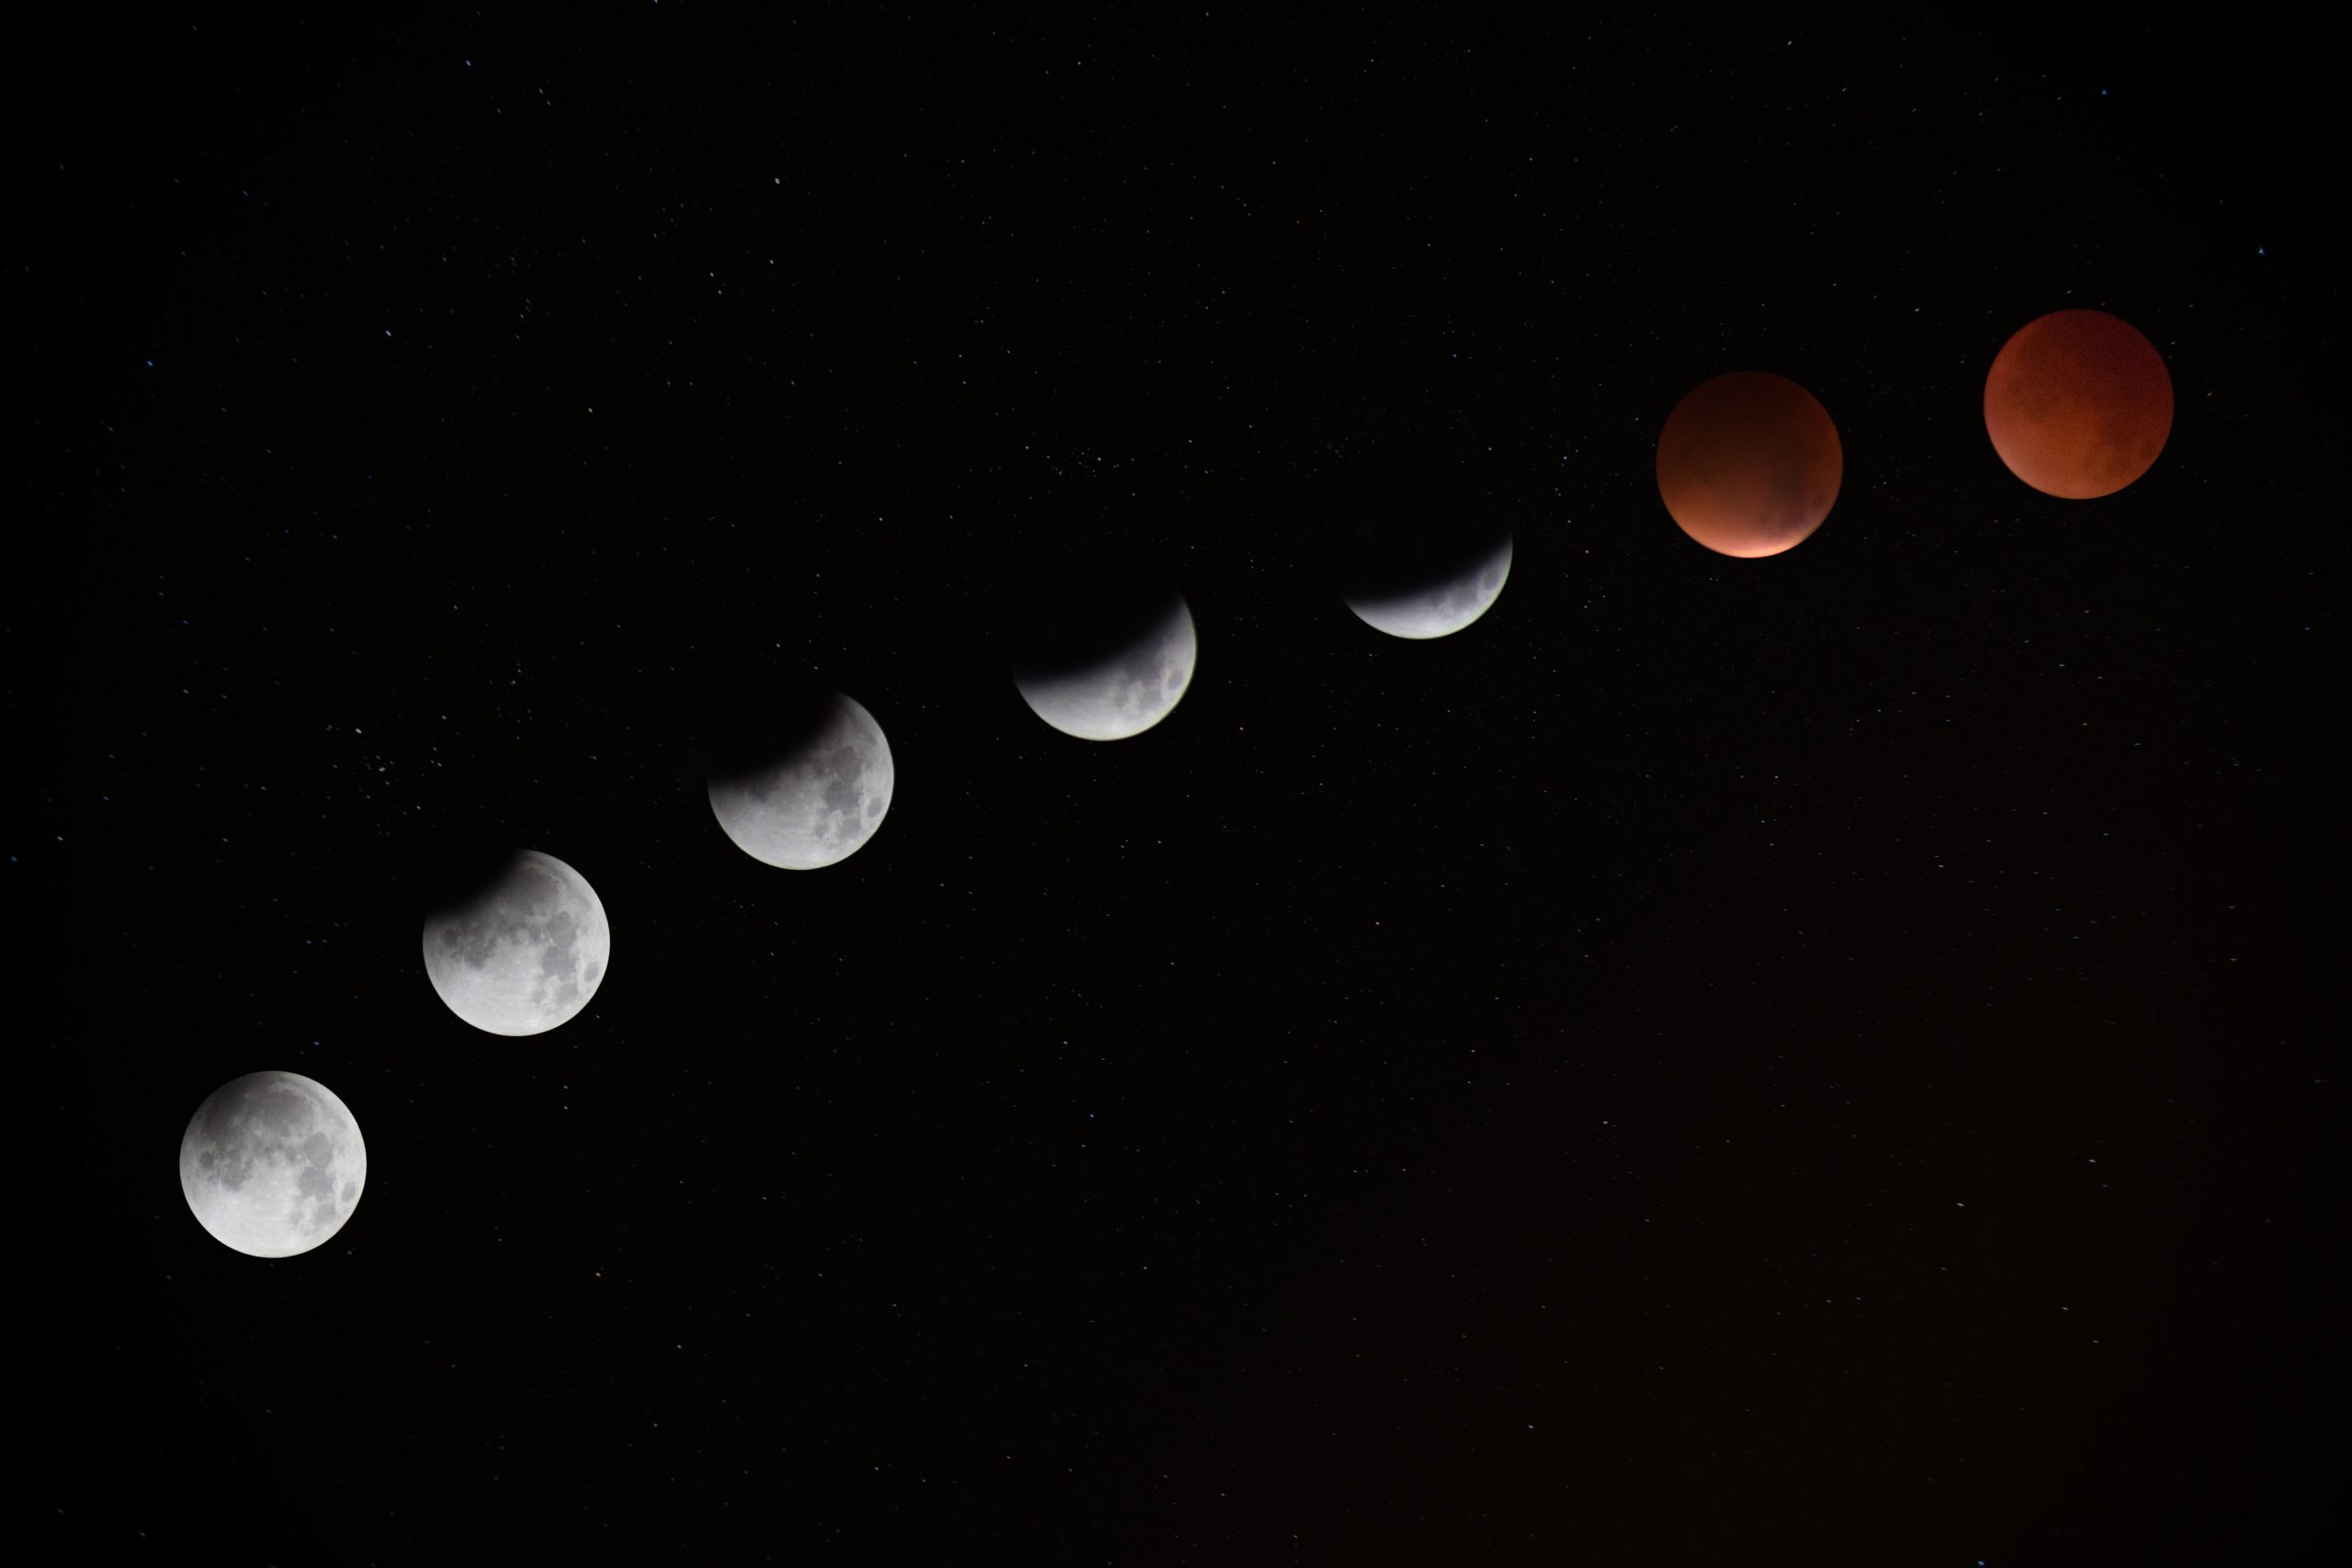
7. Keep down the noise
When setting your camera for nighttime photography, one of the most important settings to remember is ISO. ISO is a function that controls the light sensitivity of the camera’s imaging sensor.
In this case, that means that the ISO is helping the camera “see” light in a dark place. ISO is always in play, even if you’re using a pre-programmed setting, and we recognize it as a number scale.
Typically, a daytime ISO is between 100-200, and a nightime ISO starts at 800, and can go quite high depending on the conditions at hand, and the length of your shutter speed. (Too much on both can create a washed out image!)
You will find that you’ll have to experiment a bit with the best ISO for your shot, and it’s good to try a few. For most cameras, we recommend staying below 6400, but always experiment with these combinations- as higher end cameras will have different processing strengths.
But beware- the ISO may make the aurora in your photo brighter, but you can have too much of a good thing! An ISO that is too high can create “grain” in your photo, or noise.
This can be hard to see in a thumbnail, so make sure to capture shots with multiple setting combinations to avoid getting a great shot- but with too much texture.
8. Catch every movement, the easy way
Photos are great, but what about animation? Live filming of nighttime shots has been difficult for a long time, but is starting to become possible on certain cameras.
The difficulty here is that most cameras do not allow manual setting control during video, but instead they give you a pre-set daytime mode. In order to capture an aurora on video, you still need access to those nighttime settings just like you do in photos.
The good news is that tech is catching up and allowing us these options more and more- but what if you don’t have one of those gadgets? Luckily, you can go the route of a traditional aurora hunter and try out time lapse.
A time lapse is a collection of many photos taken in quick succession, that are put together later to create a slideshow. After controlling the speed of this slideshow, you can use photos to simulate filmed movement in an auroral occurrence.
Many cameras have a time lapse function already, so you can just set it, and forget it! (Make sure to test it before you go out, this can be a tricky one to troubleshoot in the field.)
9. Don’t forget to turn ON the lights
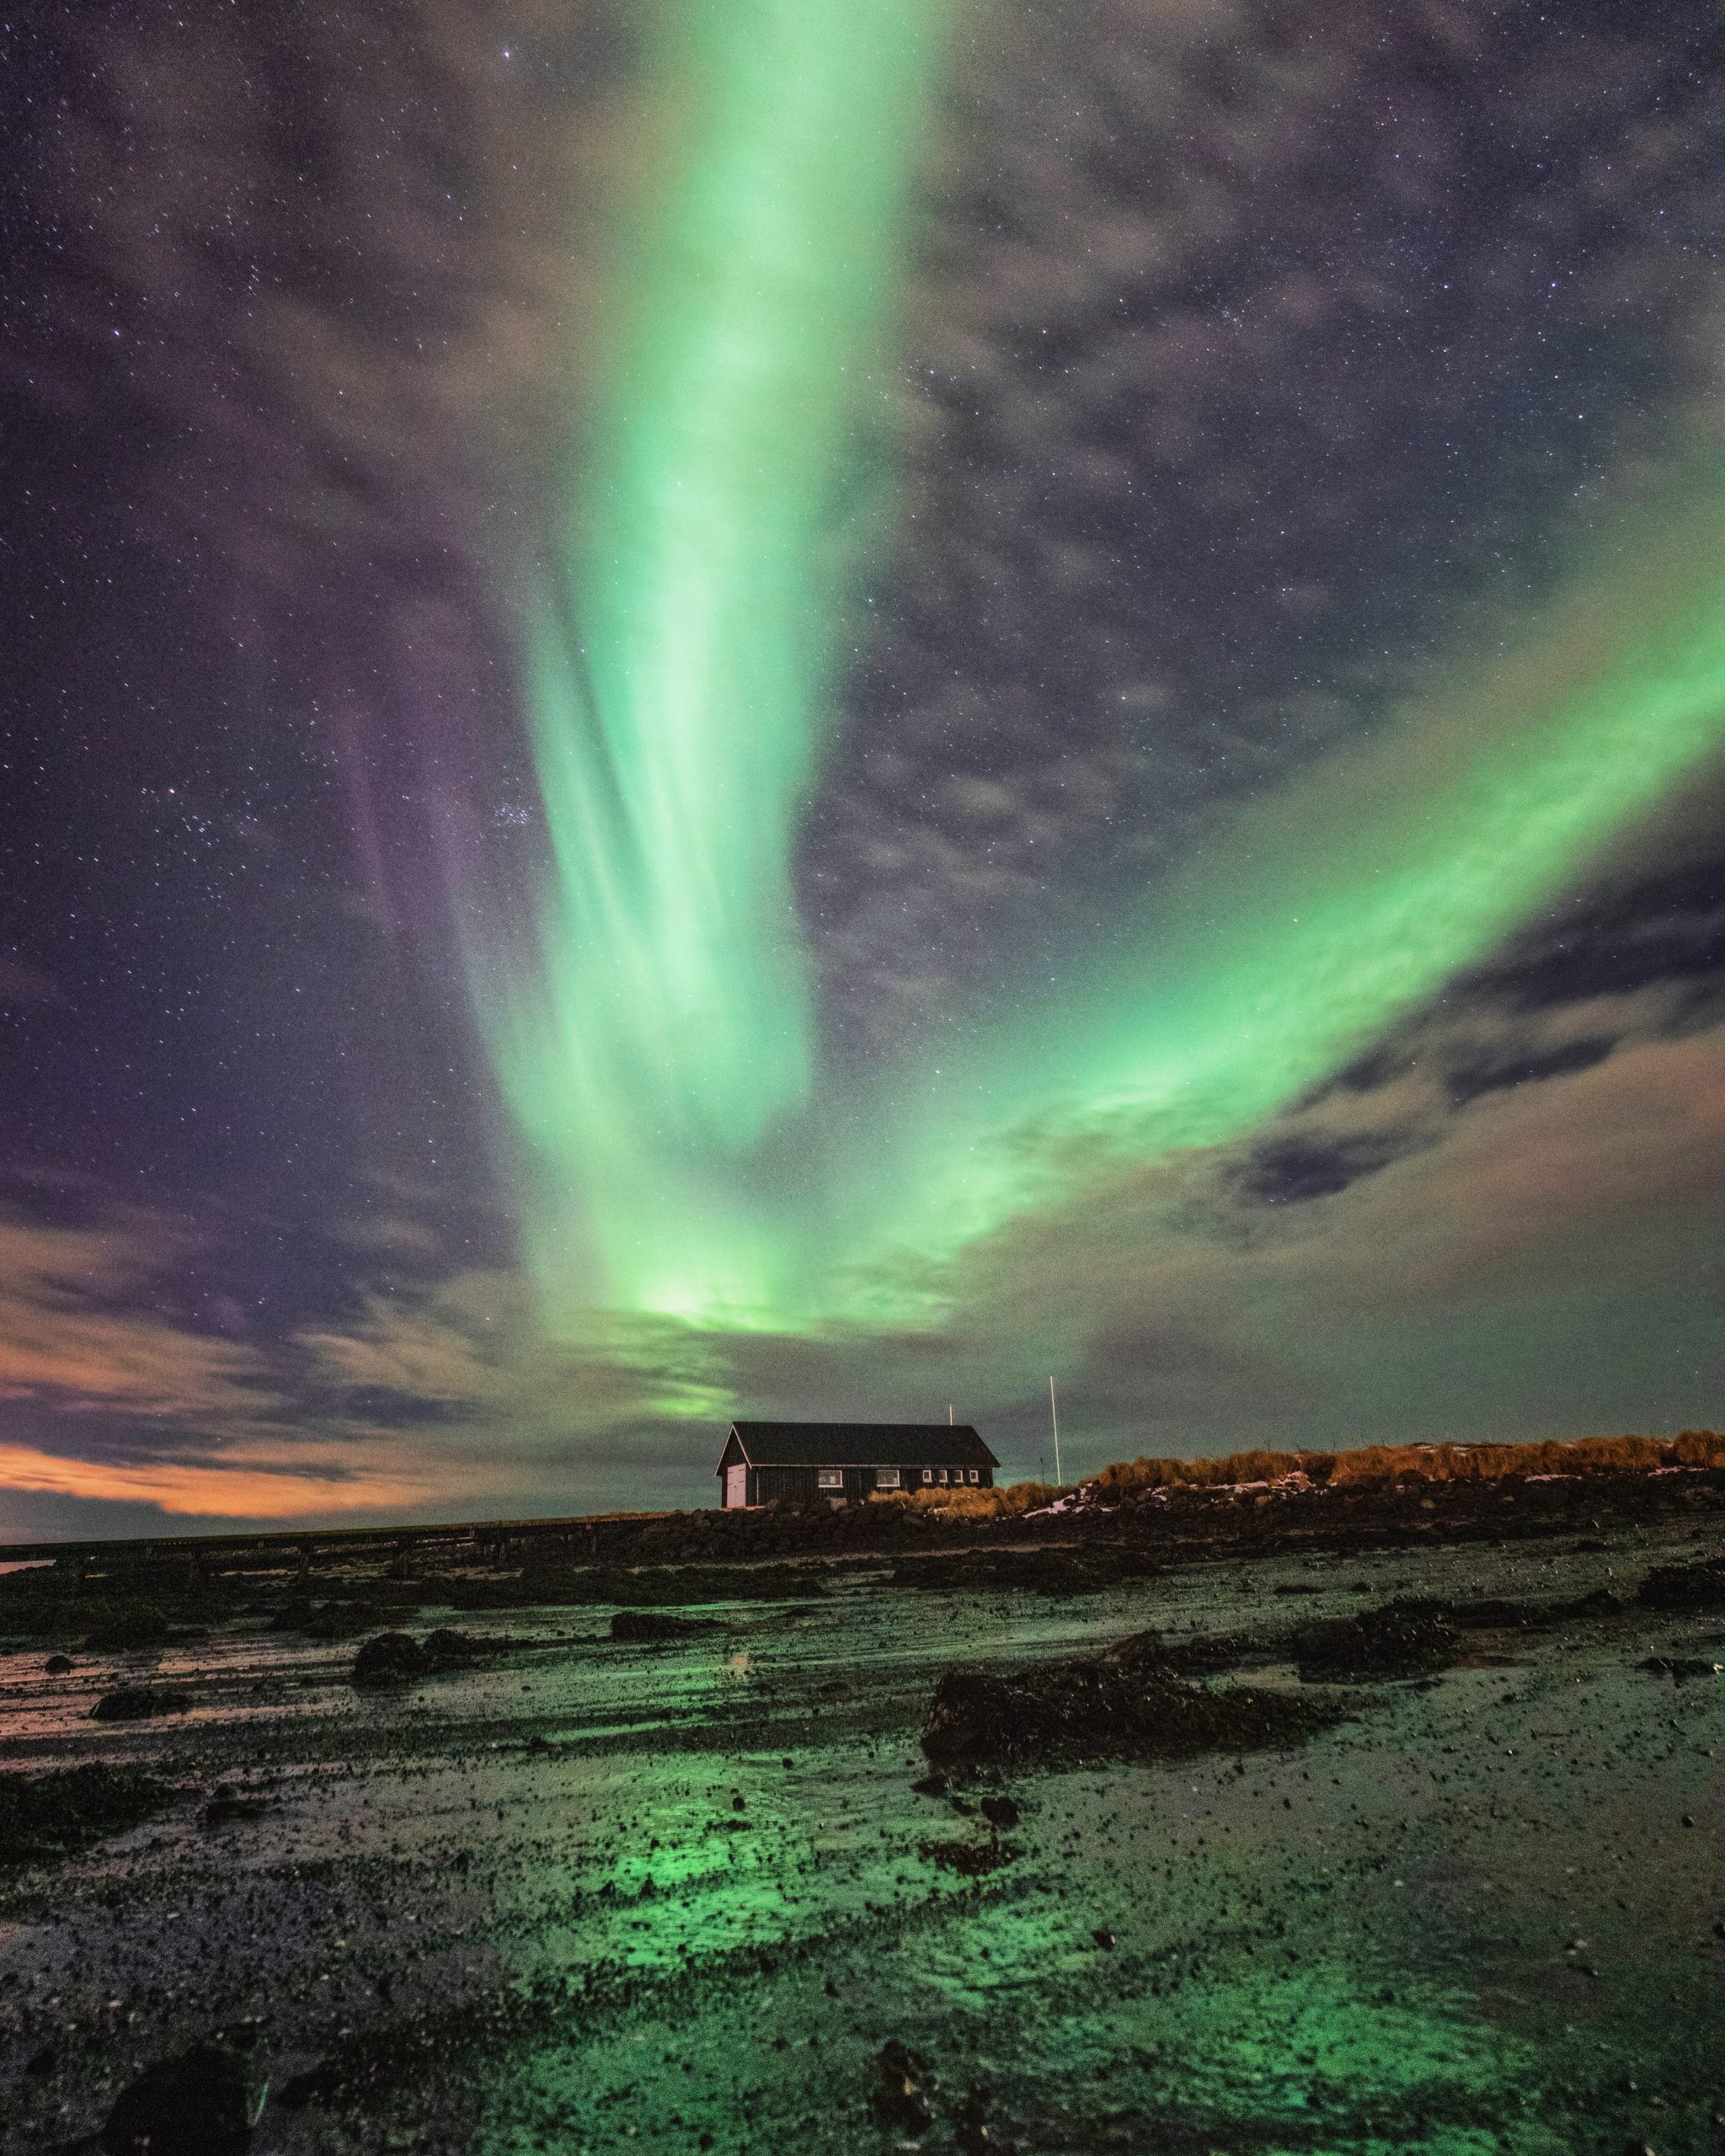
Believe it or not, there are actually moments where a little light pollution can help us out. In instances where you want to be in the shot, or want to light the foreground a bit, try experimenting with small lights or vehicle headlights to carefully illuminate a smaller foreground object.
These photos takes some experimenting to get right, as too much light during a long shutter process can create overexposure. Sometimes it’s enough to just flash a cell phone light for a few seconds, and allowing the camera to capture that moment and layer it in.
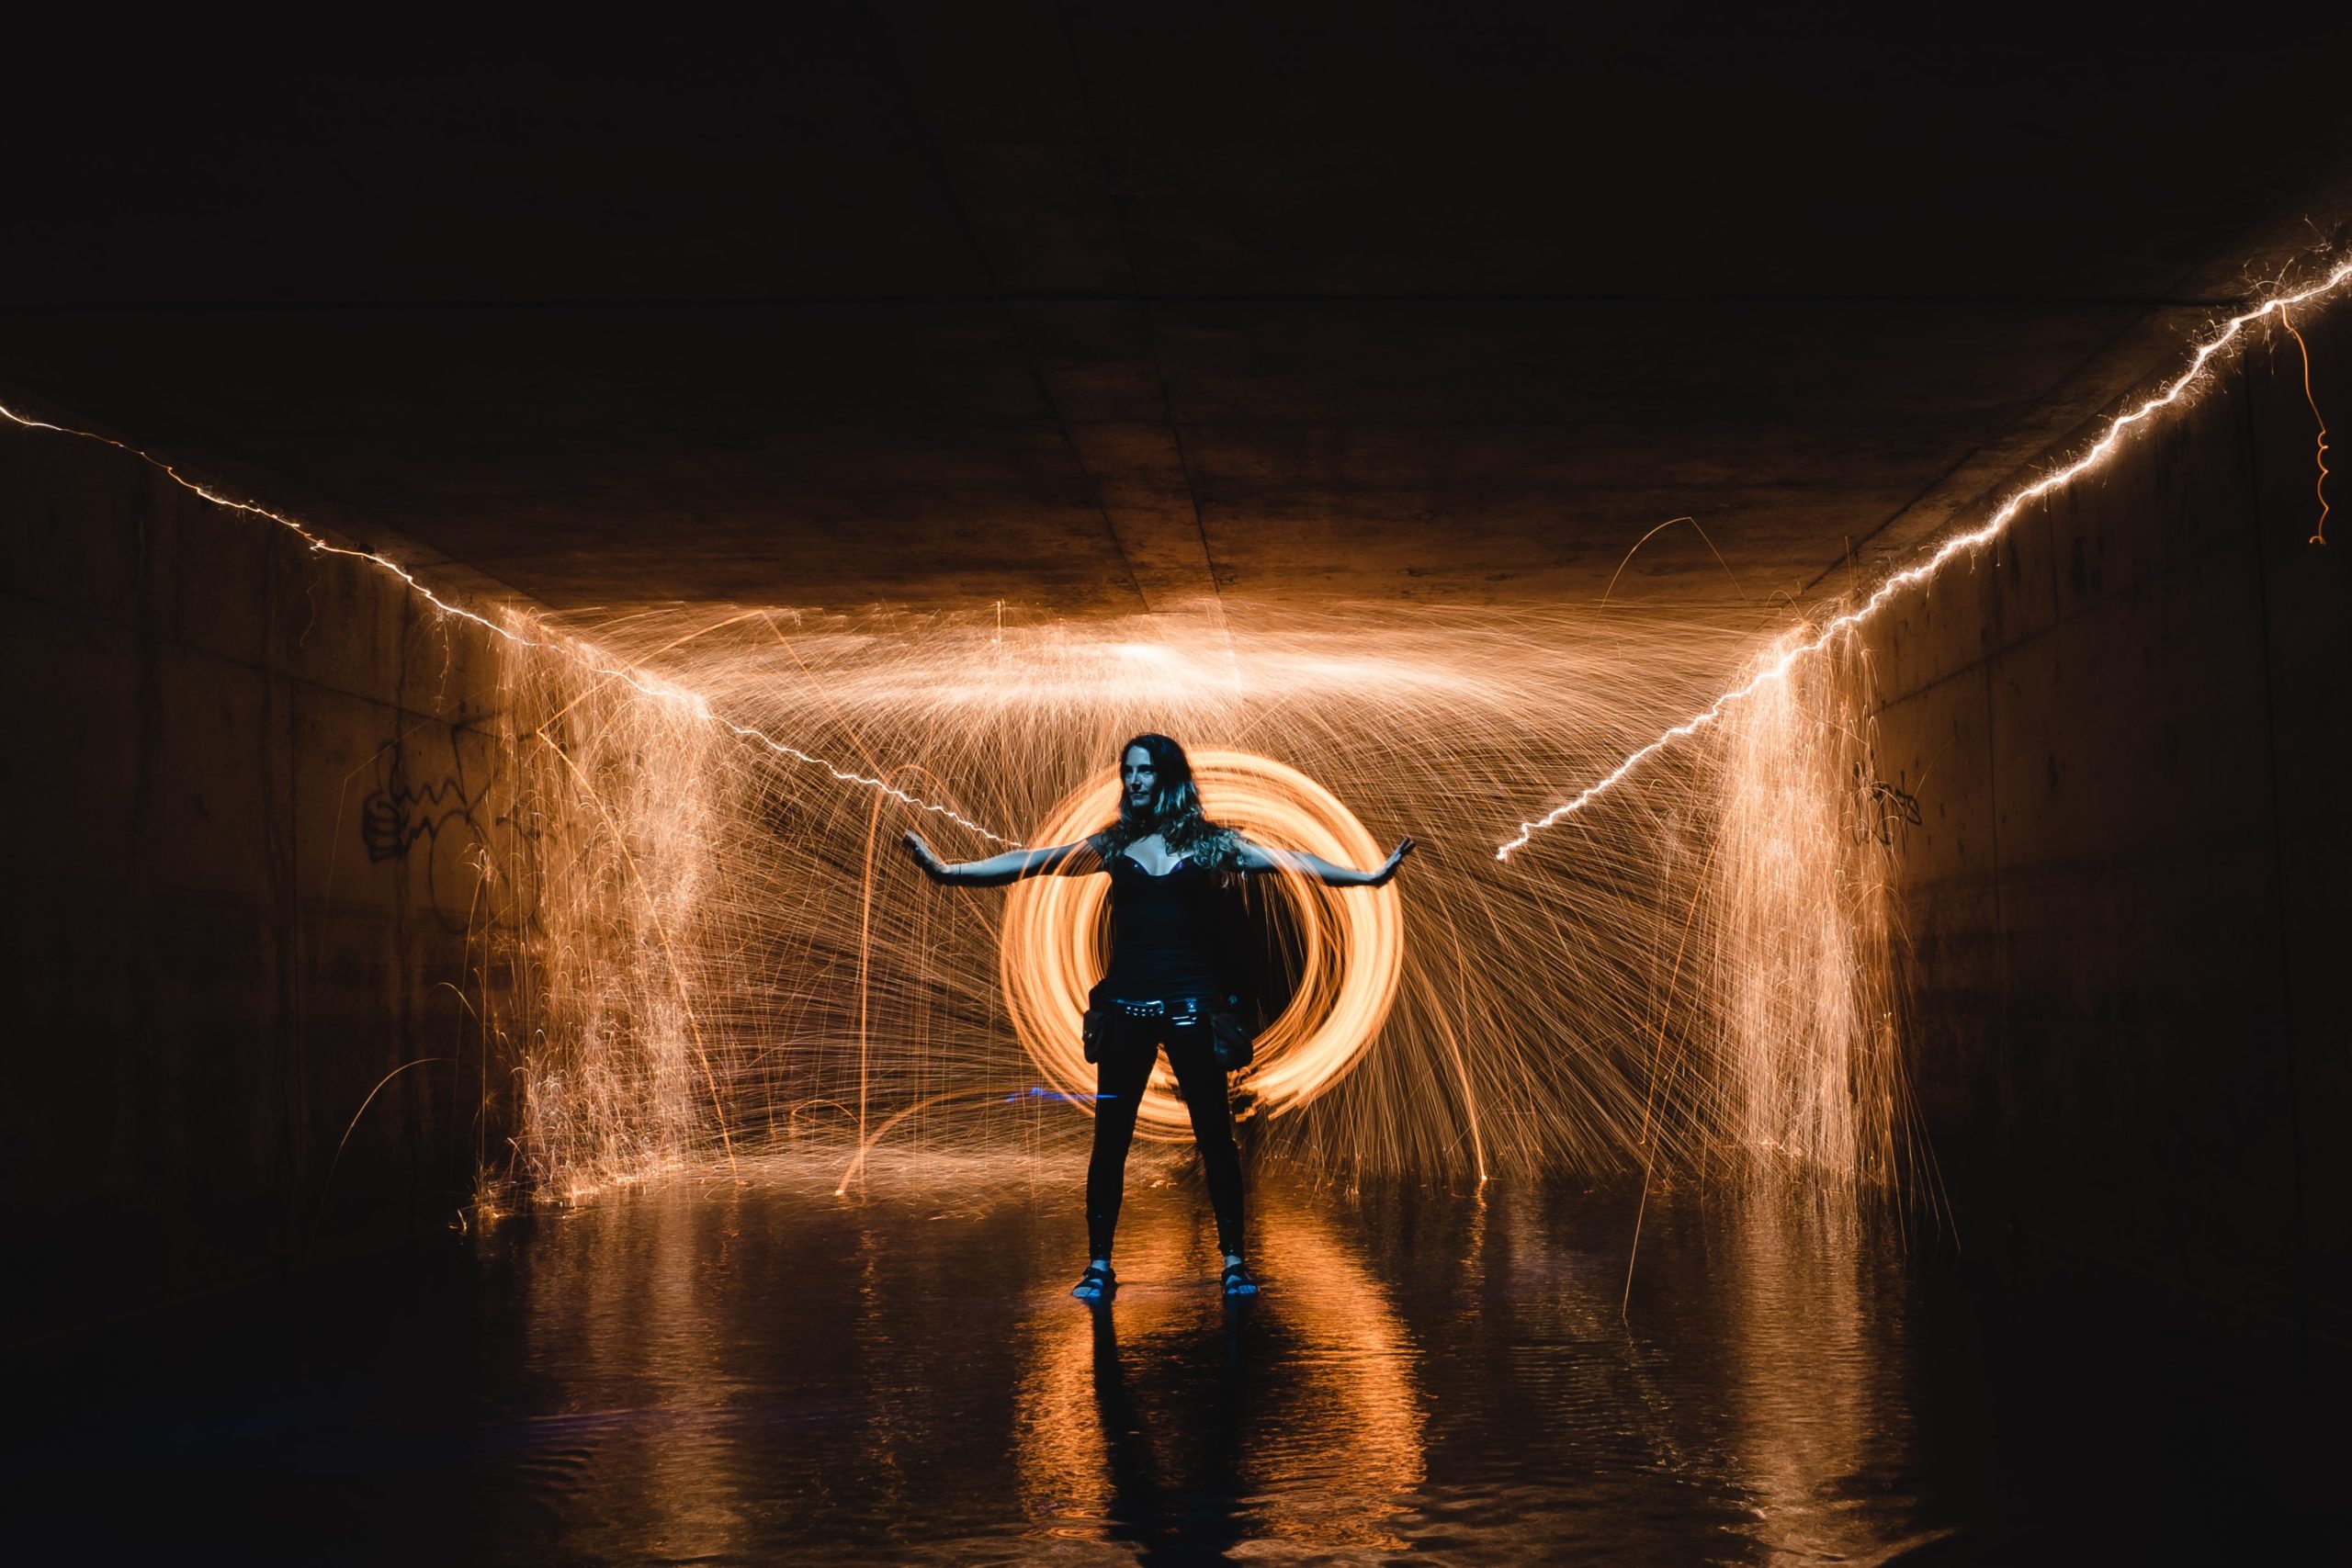
A well diffused porch light can do the trick- or even a good flashlight. And if the northern lights are running late, don’t forget about light painting!
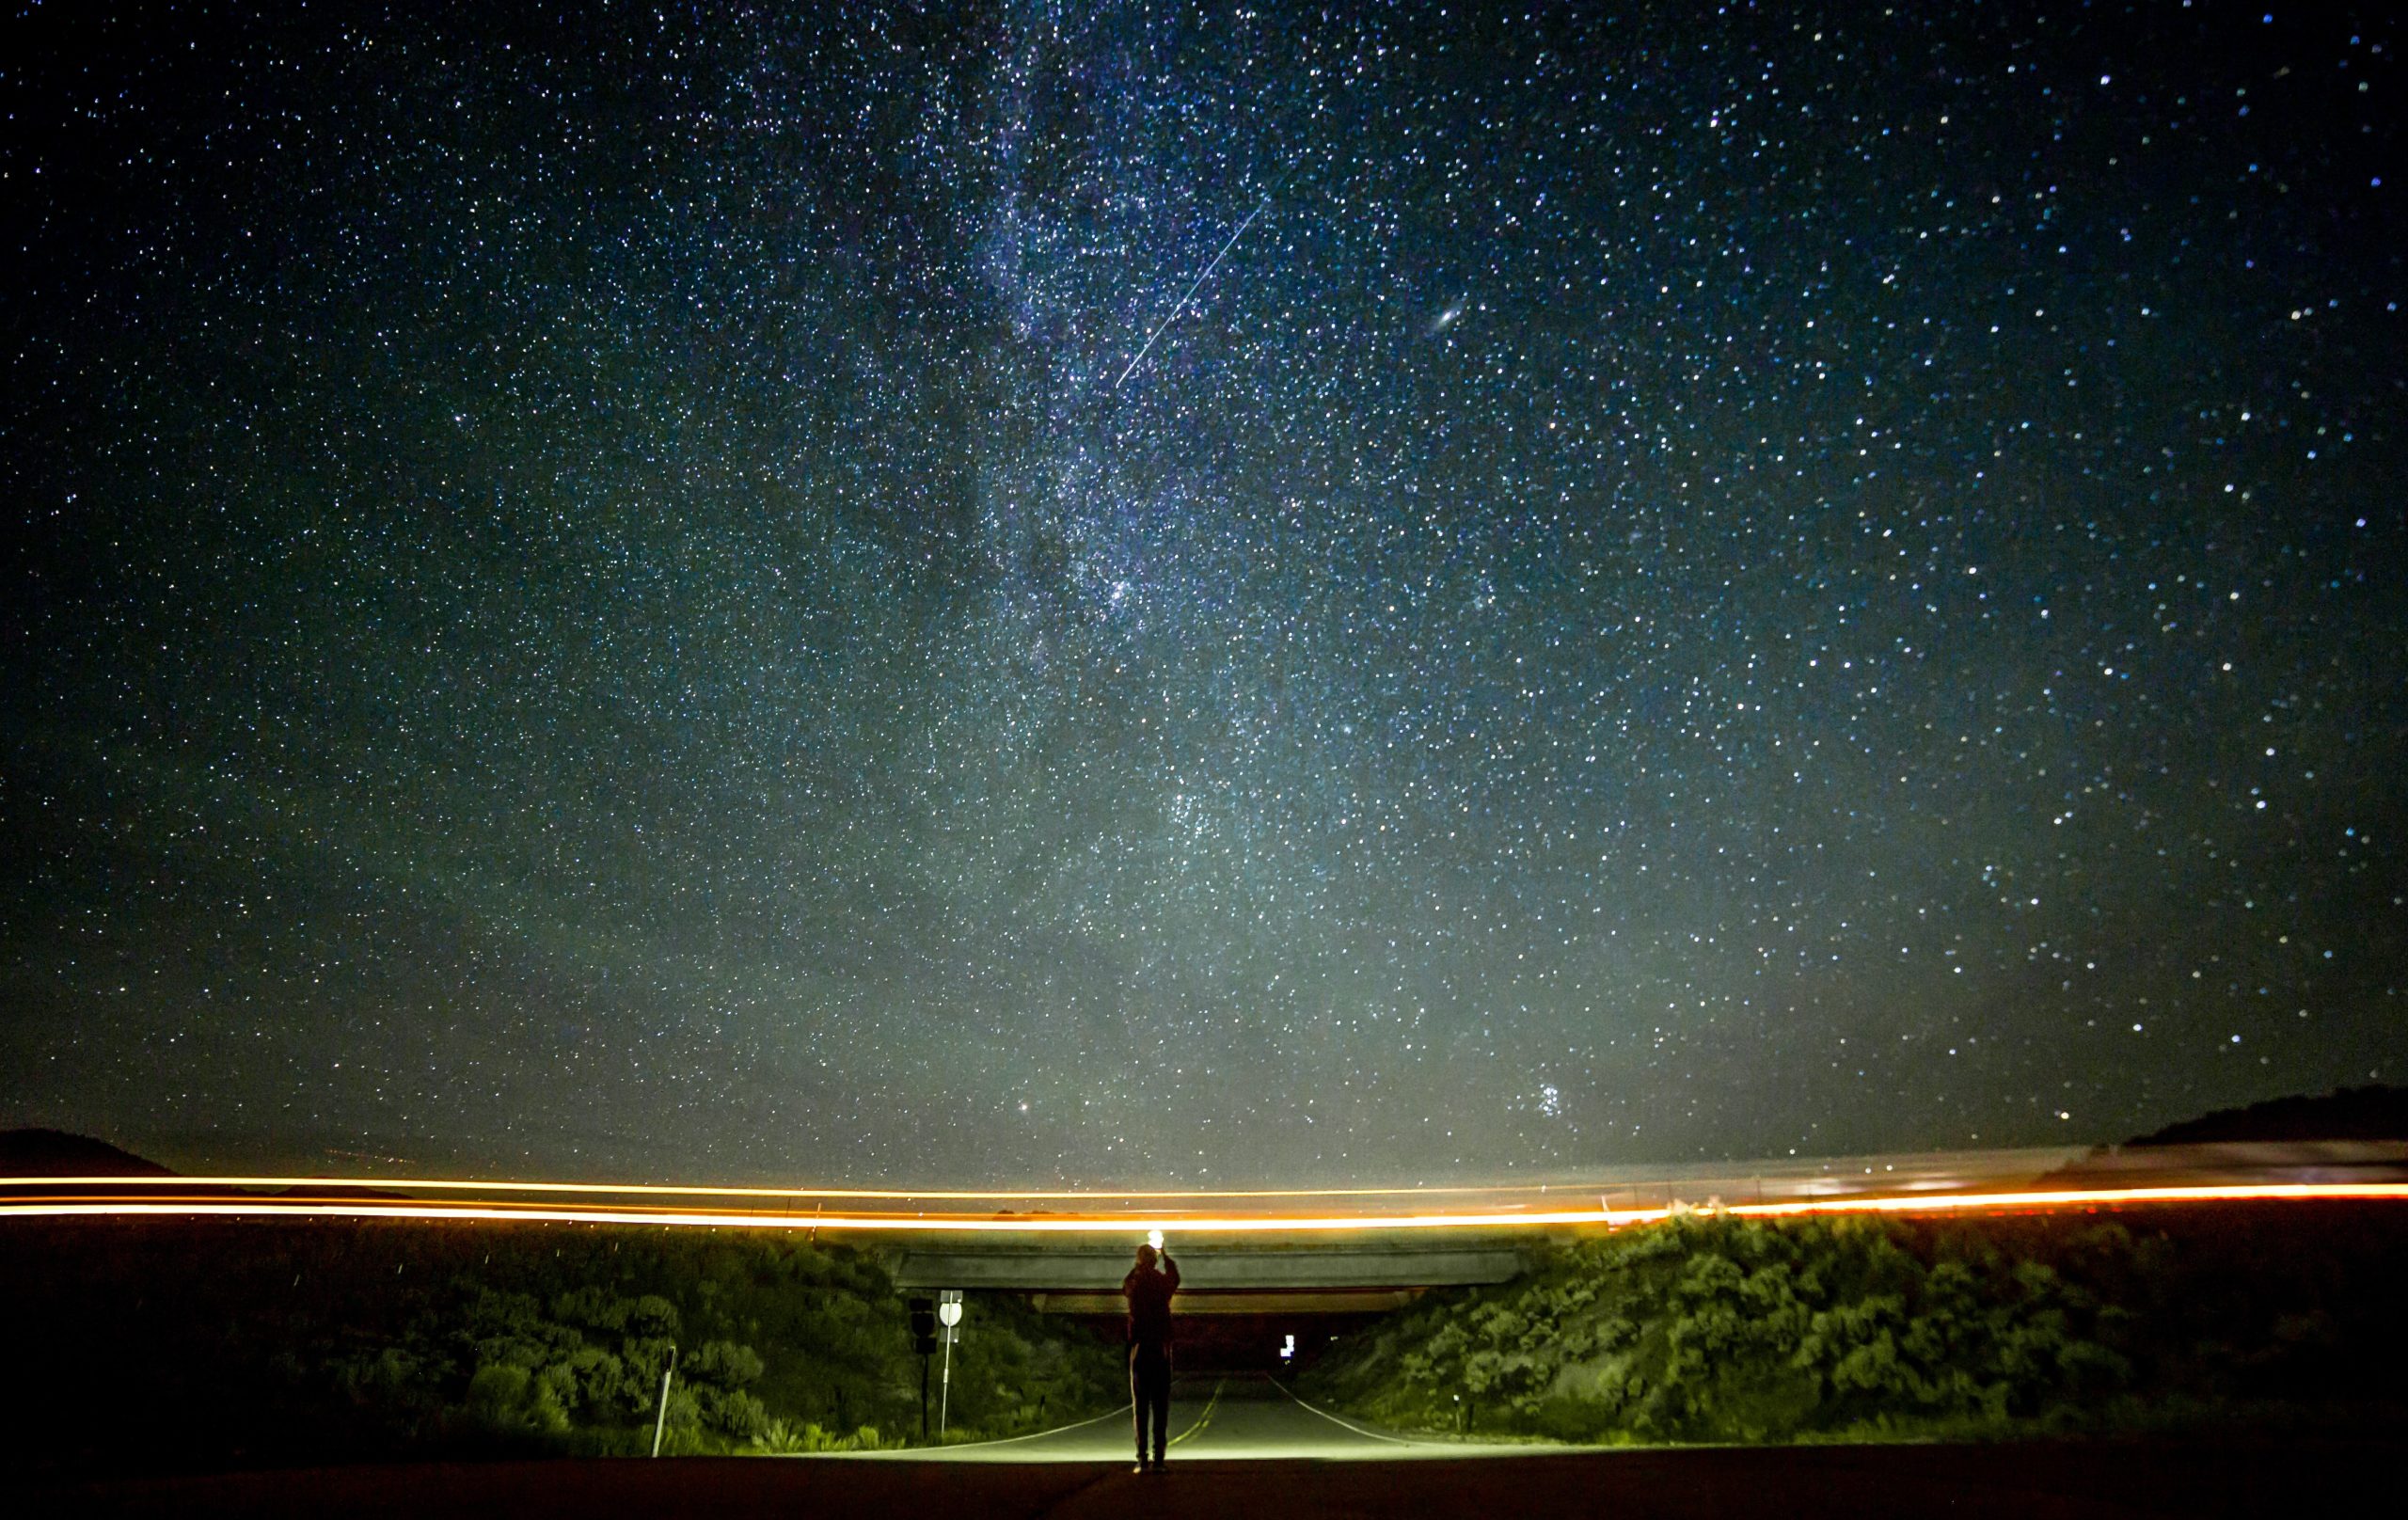
Allowing a camera to take a photo on an extra long shutter can create motion blur in a photo- which gives you a chance to write a message or draw a symbol with a small light.
You’ve likely seen some of these images before- and they can be a lot of fun on a night when you’re biding your time waiting. Try setting your shutter to bulb for more time, and experiment with star trail shots as well! After all, the aurora isn’t the only light up here.
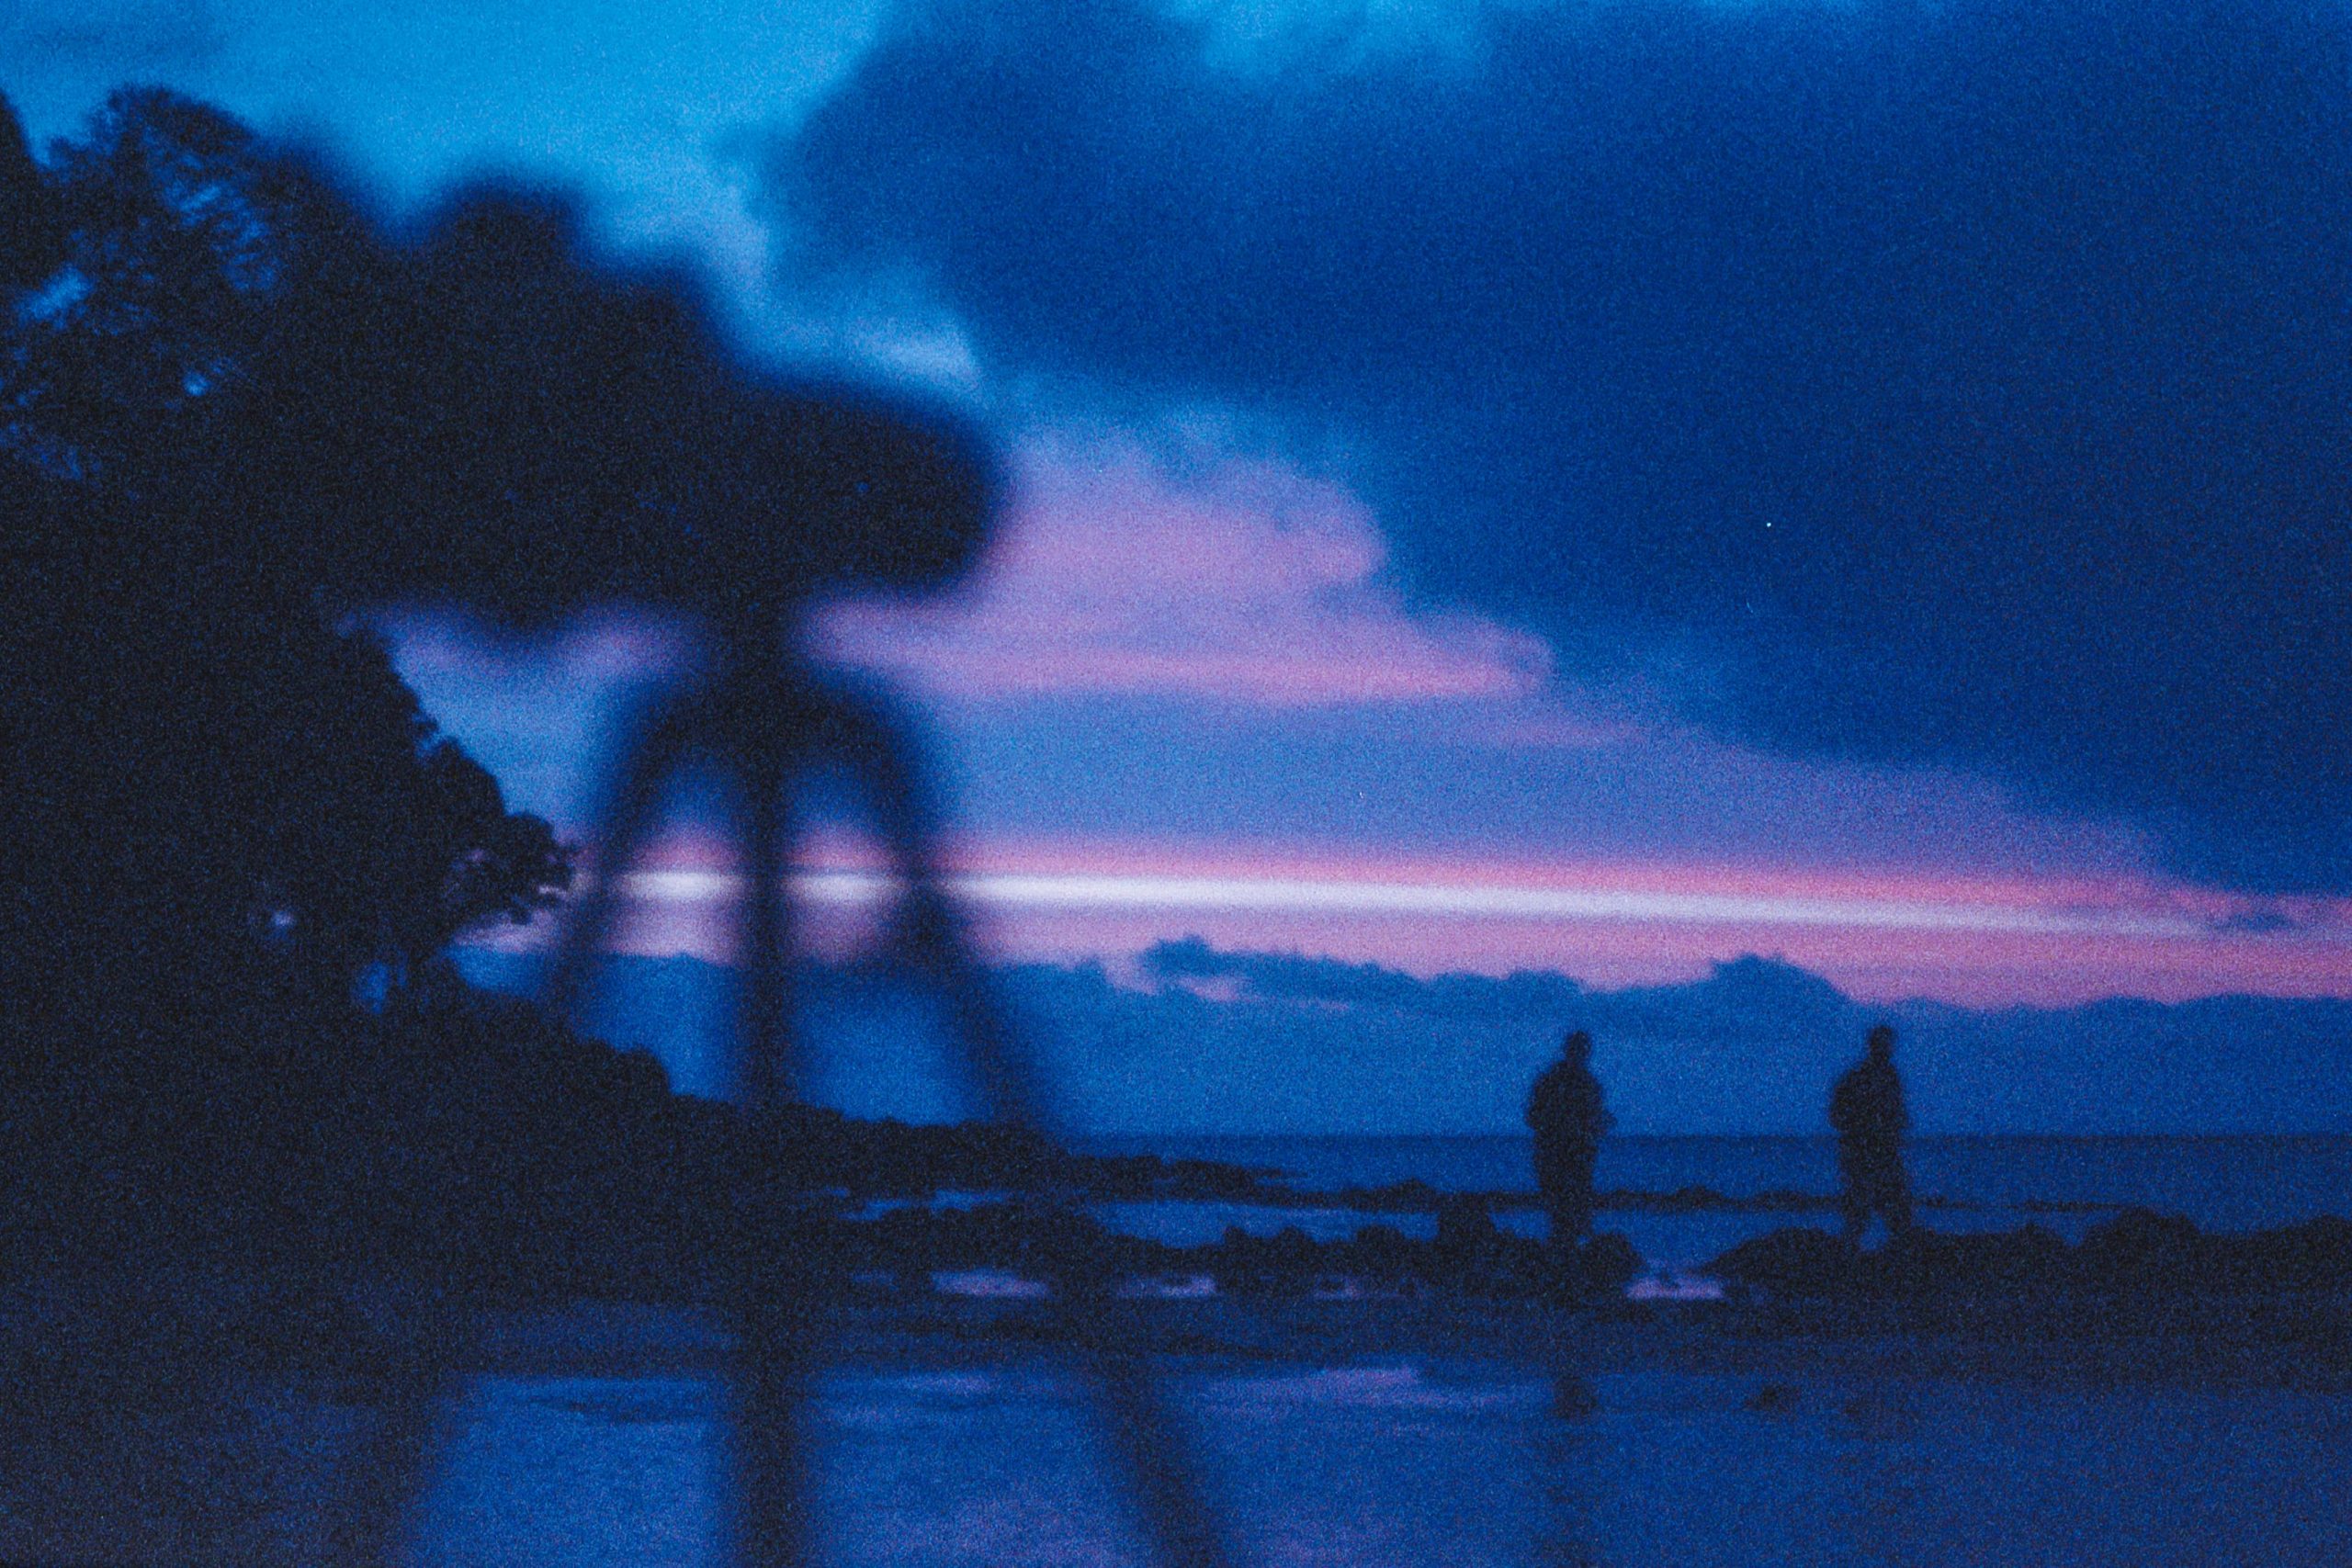
10. Pick your favorite color
Disclaimer: If you can, shooting in RAW is a preferable starting place. The RAW image format allows the image to retain more data, which helps you out later if you plan on post processing the image later.
A RAW image would retain enough data that you would be able to adjust the white balance later on. However, if you don’t have this ability, or you don’t want to bother with post processing, this tip is for you.
Once you’ve set your camera within the typical nighttime setting range, you’ll find that funny things can happen with color. Messing with somebody’s concept of light can do that.
However, don’t fret! If your photo is exceptionally orange or extremely blue, this can be quickly remedied by changing the white balance on your camera. The white balance option often has its own button indicated by “WB”, but can also be found in your camera’s settings menu.
This function gives you a menu of different icons that correspond to different “temperatures”. These temperatures will change the color cast of your images, so you can use them to control the warmth or coolness of your shot.
This is a pretty subjective setting, so you may need to try a few to get the look that you want.
10 brilliant aurora spots in Reykjavik, Iceland: City of Northern Lights
Heading out into the country is the go-to for most aurora hunters, but how lucky can you get in the city?
Reykjavik, Iceland Northern Lights: Can it be done?
Destination Reykjavik, Iceland, Northern Lights: The world’s northernmost capital, is the first stop for most of the country’s aurora hunters. But is it possible to see the lights there, or does one truly have to head out into the wild?
The capital region around Reykjavik, Iceland houses nearly two thirds of the Icelandic population. This makes for a busy little city in the southern climes of Iceland, and also makes for some of the greatest light pollution in the North Atlantic, until continental Europe.
For many intrepid skywatchers, the first advice is to get out of town and into the country, if only ten minutes away, to access better darkness and get away from the buzz of electric light.
For our eyes to have a starting chance of processing auroral light, it does make a big difference to increase the darkness of your surroundings. This is a thing that happens in stages, depending on what you have the power to control.
For some, it means heading out into the night down a long, quiet country road. But for others it just means shutting off the porch lights, dimming the vehicle console, letting cell phones rest- or just turning away from the streetlights and hoping for the best. You can’t always change the light pollution in your location, and sometimes you don’t need to.
Nature has a way of surprising us sometimes. If given the chance, it is certainly easier to see Northern Lights in darker and less populated spots. The low-light photographs become easier to create without overexposure, and your eyes adjust better into this context that they were not entirely meant for.
It’s true, the city is not every aurora hunter’s first choice of location. But, as a denizen of downtown Reykjavik, I have found that while it’s not the easiest spot to watch from- it certainly can surprise you.
Nature’s light show
The aurora is an elusive character. Despite all of the careful planning and season mapping, the truth of it all is that this is an occurrence that happens above our weather system in space, and so it can start up at any moment.
This means that auroras can occur anywhere that they’re strong enough to reach, at any time of day or night, and in any season of the year. This is perhaps not the answer that they are most often associated with, but the reality is that the sun isn’t thinking too hard about what time it is at our place when it sends the activity.
In some ways, this natural defiance is good news for us, because it means that despite a common norm, there are always exceptions. One of these exceptions is aurora watching from the city. Though it would not be the recommended area to watch from, sometimes you just can’t get out.
Whether it be a short layover or a night without a vehicle, it isn’t always feasible to trek out into the wilds. Some think that this means their shot at catching the lights is over, but it just isn’t so.
Despite the light pollution of greater Reykjavik, sometimes we just can’t outshine nature. On a good night with low cloud cover, you most certainly can watch Iceland’s dancing lights, in front of some of her most notable landmarks!
How to set yourself up for success on a downtown aurora hunt
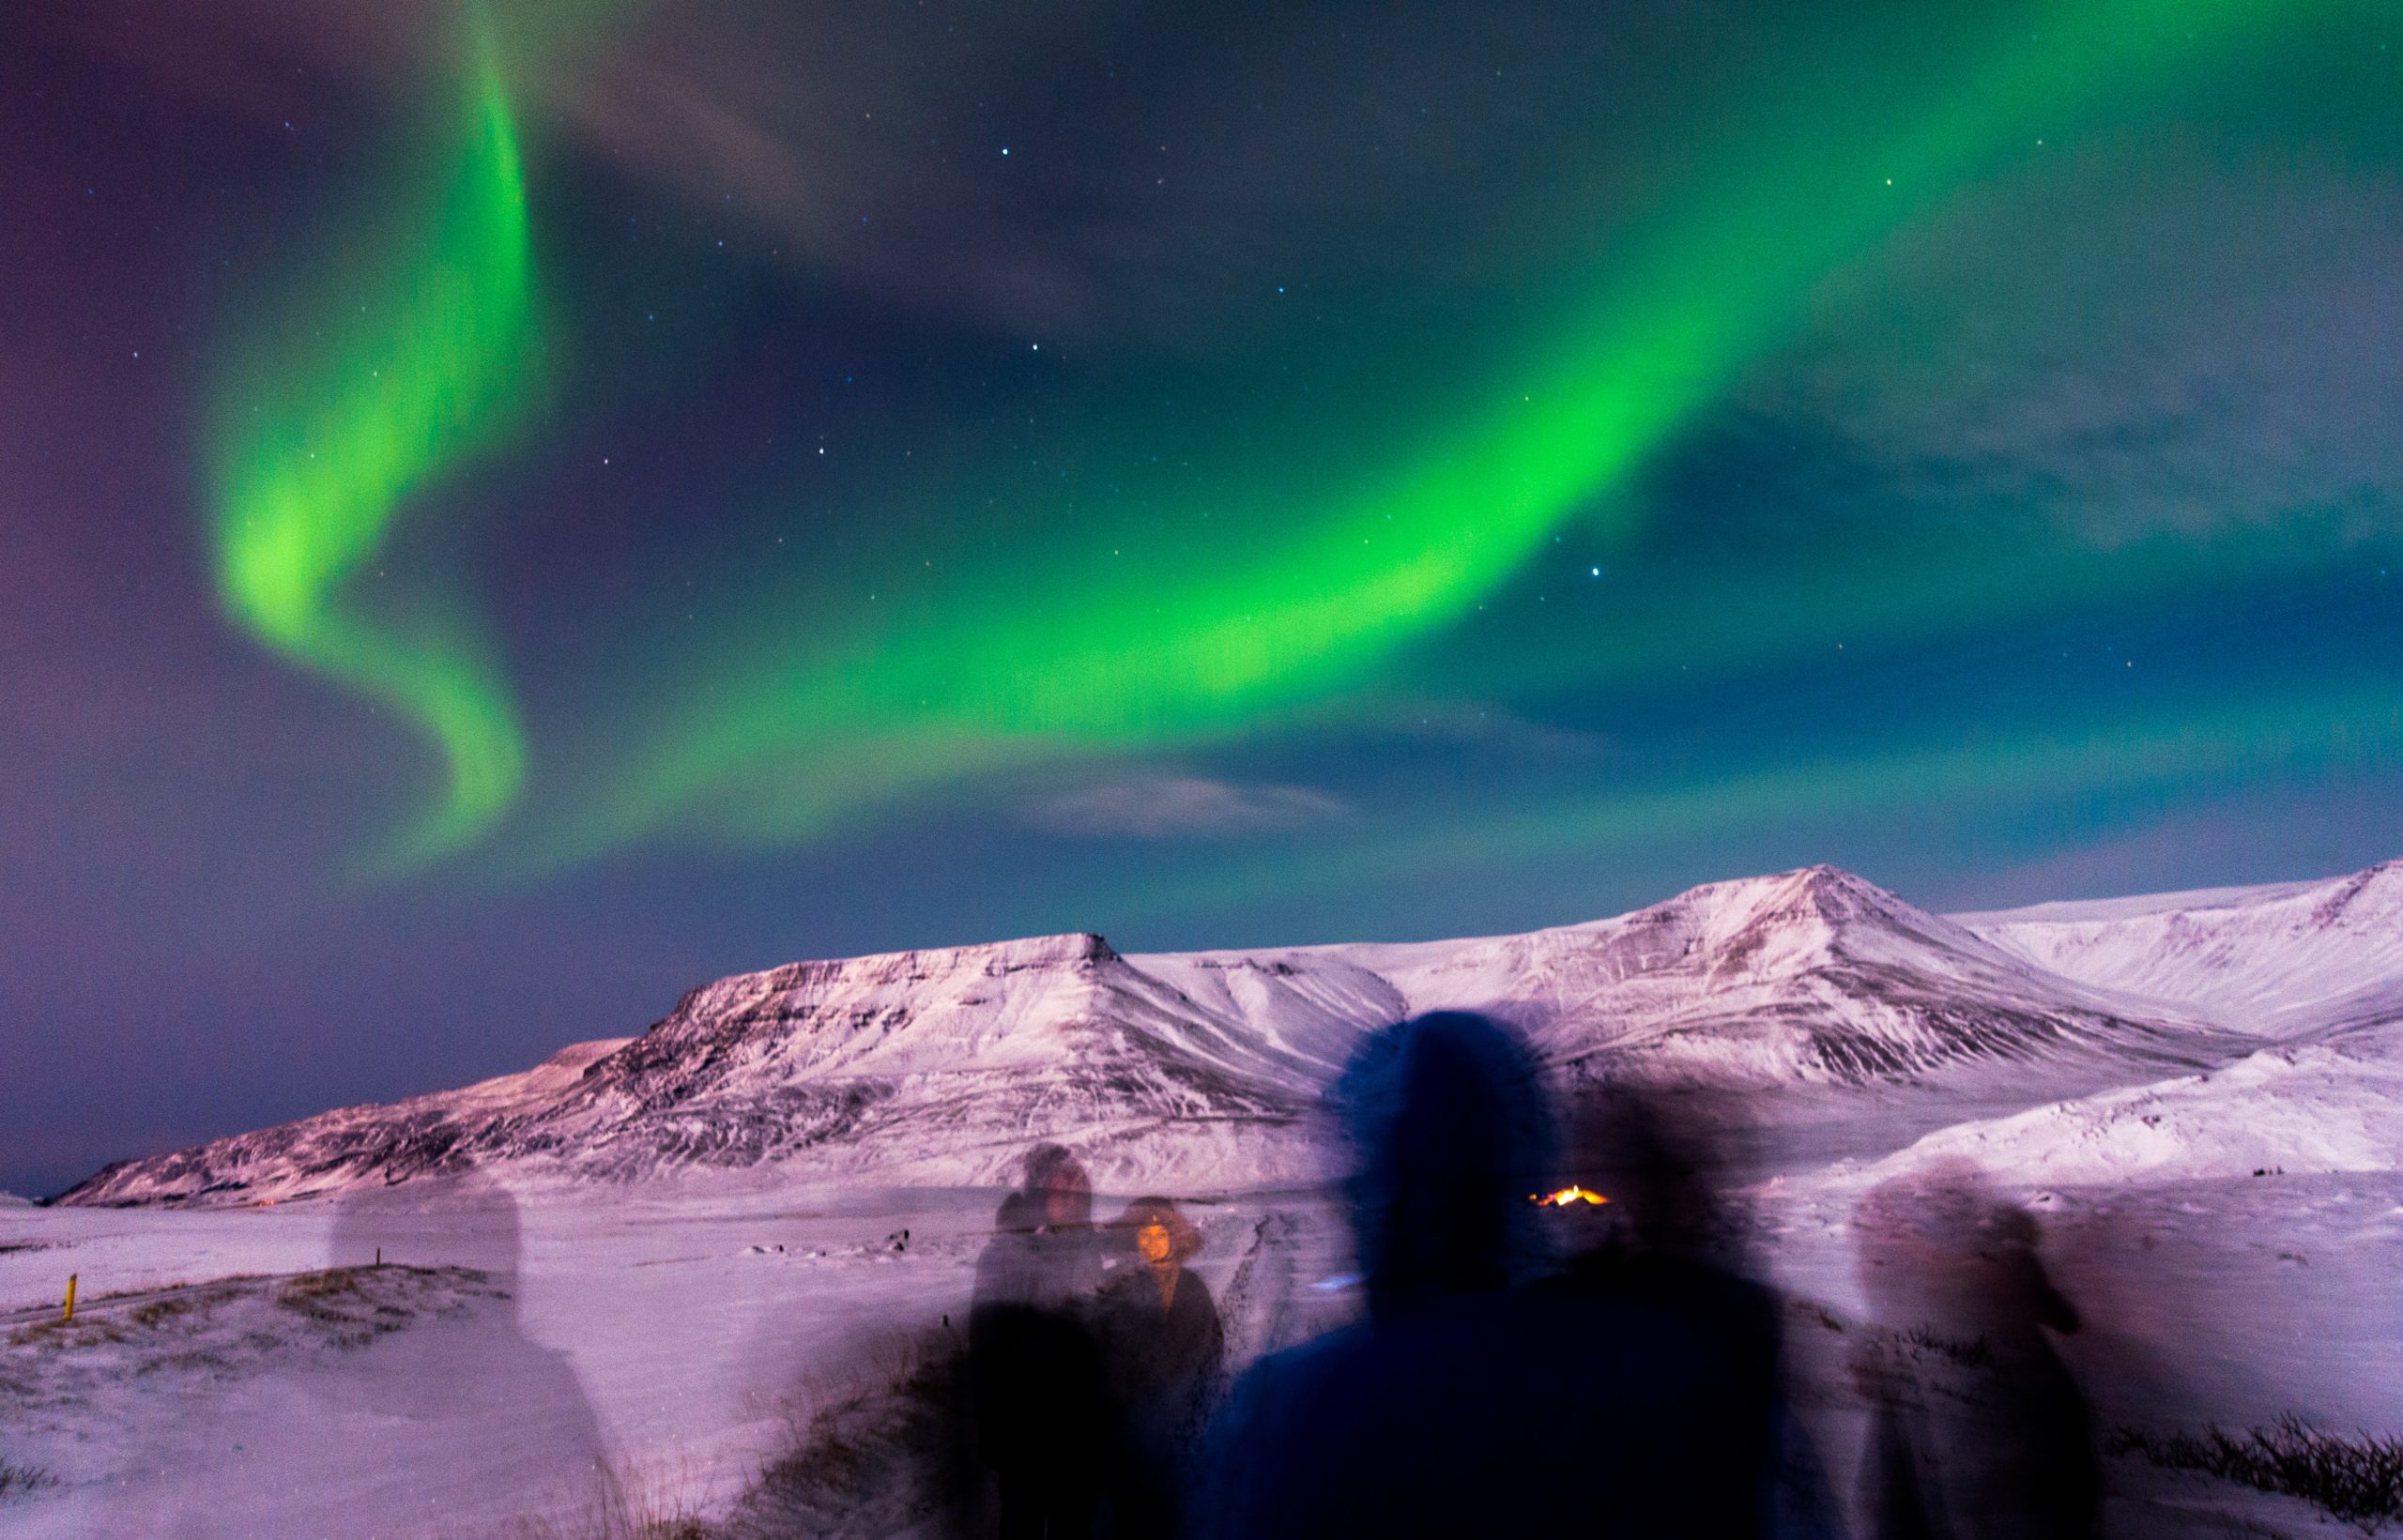
In the best conditions, a low-level aurora can be hard to see. It is common that people watching from slightly different areas have extremely different experiences, and report different intensities, different colors, and sometimes even failures vs successes.
This can be frustrating when you find out that they were only a few kilometers away from you, and you missed the show! It’s important to remember that the northern lights are a planetary occurrence that happen to our entire globe, and they are constantly moving. Despite how huge the sky feels while you’re under it, you are only really seeing one section.
This is why consistent movement on aurora excursions can be a small help on difficult nights. Keeping your eye on the sky for an extended period of time while you constantly change it up can be a more forgiving strategy than only having a few quick looks or staying put.
Especially when you keep in mind that the aurora isn’t the only thing that’s moving, the cloud cover may be as well!
However, you can still get lucky in the city. And there are a lot of perks to staying local if you’ve got to. The obvious benefit is proximity to your lodging.
Reykjavik is a walkable city, and if you’re staying in the area, you’ll always be close to your home- should you run out of camera batteries, forget your mitts, or just flat out get tired. Need a snack? There are countless places to get one!
Looking for a place to sit that isn’t a frozen rock? Not to worry, public benches line the roads and walkways. But, it’s good to keep a strategy in mind. If you’ve seen luck in the forecast and have decided to set out into town, try to keep your back to the city lights, and your eyes fixed on a dark area.
Night vision takes some time to adjust, and if you can set yourself up in a spot that isn’t directly casting a streetlight blaze into your eyes, you’ll do yourself a big favor. And to help you out, here are a few of our favorite spots:
Best city hideaways for Reykjavik, Iceland Northern Lights watching
Grótta: The most popular spot for a good aurora hunt, Grótta is a hidden gem on the Seltjarnarnes Peninsula in Reykjavik. It takes about an hour to walk there from the city center, but there are pedestrian pathways, a lighthouse, and a small geothermal pool to dip your feet into once you get there.
Acting as a nature reserve for the area’s abundant bird and sea life, parts of Grótta are closed to us in the summer to serve as nesting grounds. In the winter, however, it becomes the city’s own aurora spot.
Already a bit out of the way as far as city locations go, Grótta suffers from far less light pollution and enjoys a dark view over the water. If you choose to head to this spot, make sure to check the tide tables.
The very end of Grótta is attached to us by a very thin strip of land, which can become submerged during high tide. If you’re looking for a little slice of quiet in Iceland’s bustling capital, this is one of the best.
The Sæbraut walking path: If you check out a map, you can see that there are copious walking paths in the capital area. You can walk all the way to Hafnarfjörður if you’re feeling adventurous!
The most popular of these paths, however, is along Sæbraut, or the Sea Road, at the northern coast of the city. Running along Faxaflói Bay, this wide path takes you past many notable landmarks like the Harpa Music Hall, the Sólfar or Sun Voyager dream ship, and many local works of art and sculpture.
It stretches from harbor to harbor and takes local wanderers on a flat, accessible trek with a full view of Esja, Reykjavik’s favorite mountain. Though a seemingly obvious spot, it truly is one of the best. Easy to get to, central to downtown, and sporting one of the best dark views over the water in a northerly direction that there is!
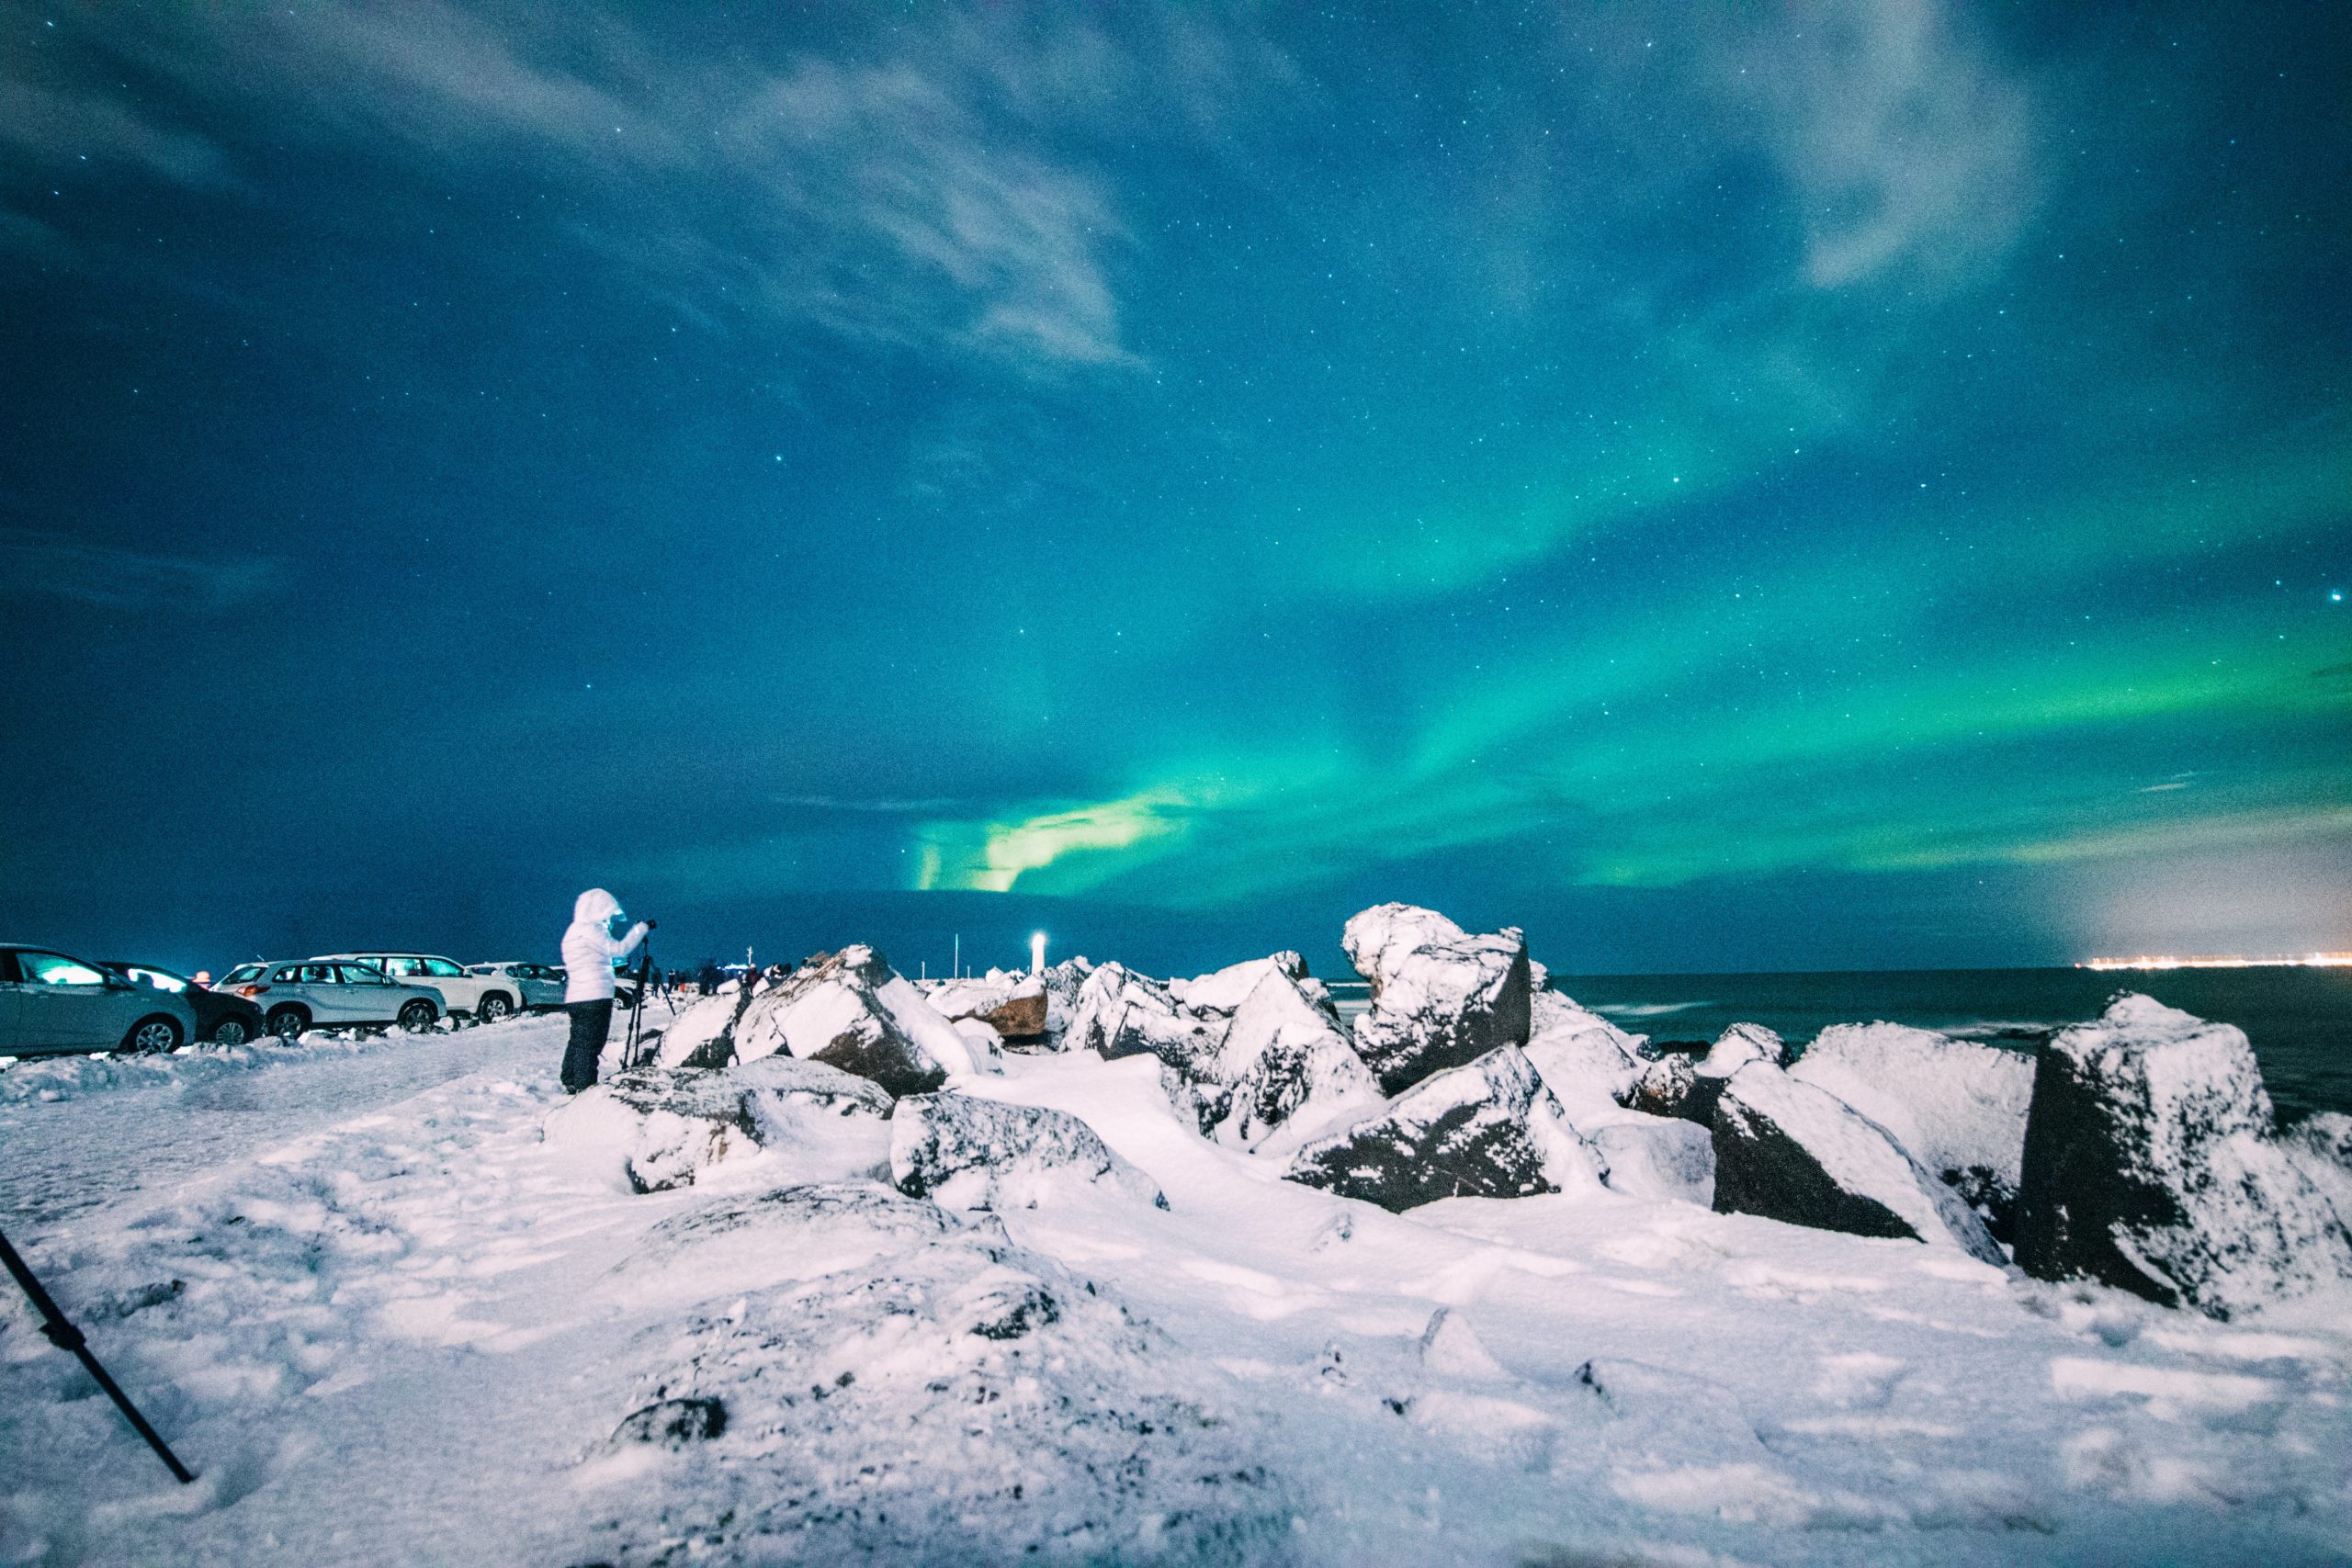
Not having to look at any lights over that expanse of water is easy on the eyes, and on a good aurora night, one can find many hopefuls lining the path and balancing their tripods on the barrier rocks.
Having this unobstructed view towards Esja is as good as a compass for finding north, and being able to keep the streetlights mostly behind you is a lucky mercy.
If you plan to try your luck on the Sea Road, it’s often best to set yourself up a bit of a way away from Harpa, and she is often busy conducting a light show in the evening. (Though, while you wait, it is spectacular to watch!)
Sky Bar: Looking for a slightly more luxe place to watch from? We’ve got you covered. For those who’d prefer to have a cocktail while they wait, we recommend the Sky Bar, resting on the 8th floor of Center Hotels Arnarhvoll.
Open until 23:00 (at the time of this writing), Sky Bar boasts some of the best views of Faxaflói Bay that you can get, without scoring a meeting in a waterfront board room or making a friend in one of those high rise apartments.
Öskjuhlíð: Resting pretty on a 61 m. high hill is the home of Perlan, and one of Reyjavik’s lushest forests. A veritable tangle of woodland hiking trails, Öskjuhlíð is a curious oasis with a great view.
It’s a bit of a hike to get to the top, but one can enjoy the glistening dome of Perlan, the memory of military bunkers from a century gone by, and even the new site of the Ásatrúarfélagið temple.
Depending on the side you watch from you may have to look over some city lights to view the sky, but on a good night, this can be a phenomenal spot to take a photo from.
Get the shot: Local landmarks to capture on film
If you’re in Reykjavik, Iceland northern lights hunting, you’ve got an excellent opportunity to grab a showstopping photo while you’re there. Many people leave Iceland with gorgeous sky shots of open country- but a Viking longship, or a cathedral built to look like basalt columns? These local treasures make for some dramatic foregrounds. Here are a few of our favorites:
Lighthouses: It’s hard to pick just one! There are over five active lighthouses in the greater Reykjavik area, and even more outside of town!
Icelanders are a coastal people, so you’ll find no shortage of these beacon towers on your journey. When in town, key an eye out for these bright yellow structures.
Esja: Reykjavik’s very own distinctive mountain and favorite hiking destination of locals and visitors alike, Esja lies in a northerly direction from the city center.
Looking across the dark bay to capture a stunning photo with Esja in focus is a great souvenir of your time in this seaside city.
(And for those with transportation, the parking lot at the base of Esja can be a great close by dark area for last minute viewing!)
Hallgrímskirkja: The tallest church in the country, Hallgrímskirkja is usually the star of most photos that it appears in- so it’s hard to imagine it taking a back seat to northern lights.
But, with its basalt column structure, and its prominent memorial to Leif Erikson out front, this hilltop spot has lots of seating and lots of space.
(Come back during the day to try out the observation tower for a great panoramic view!)
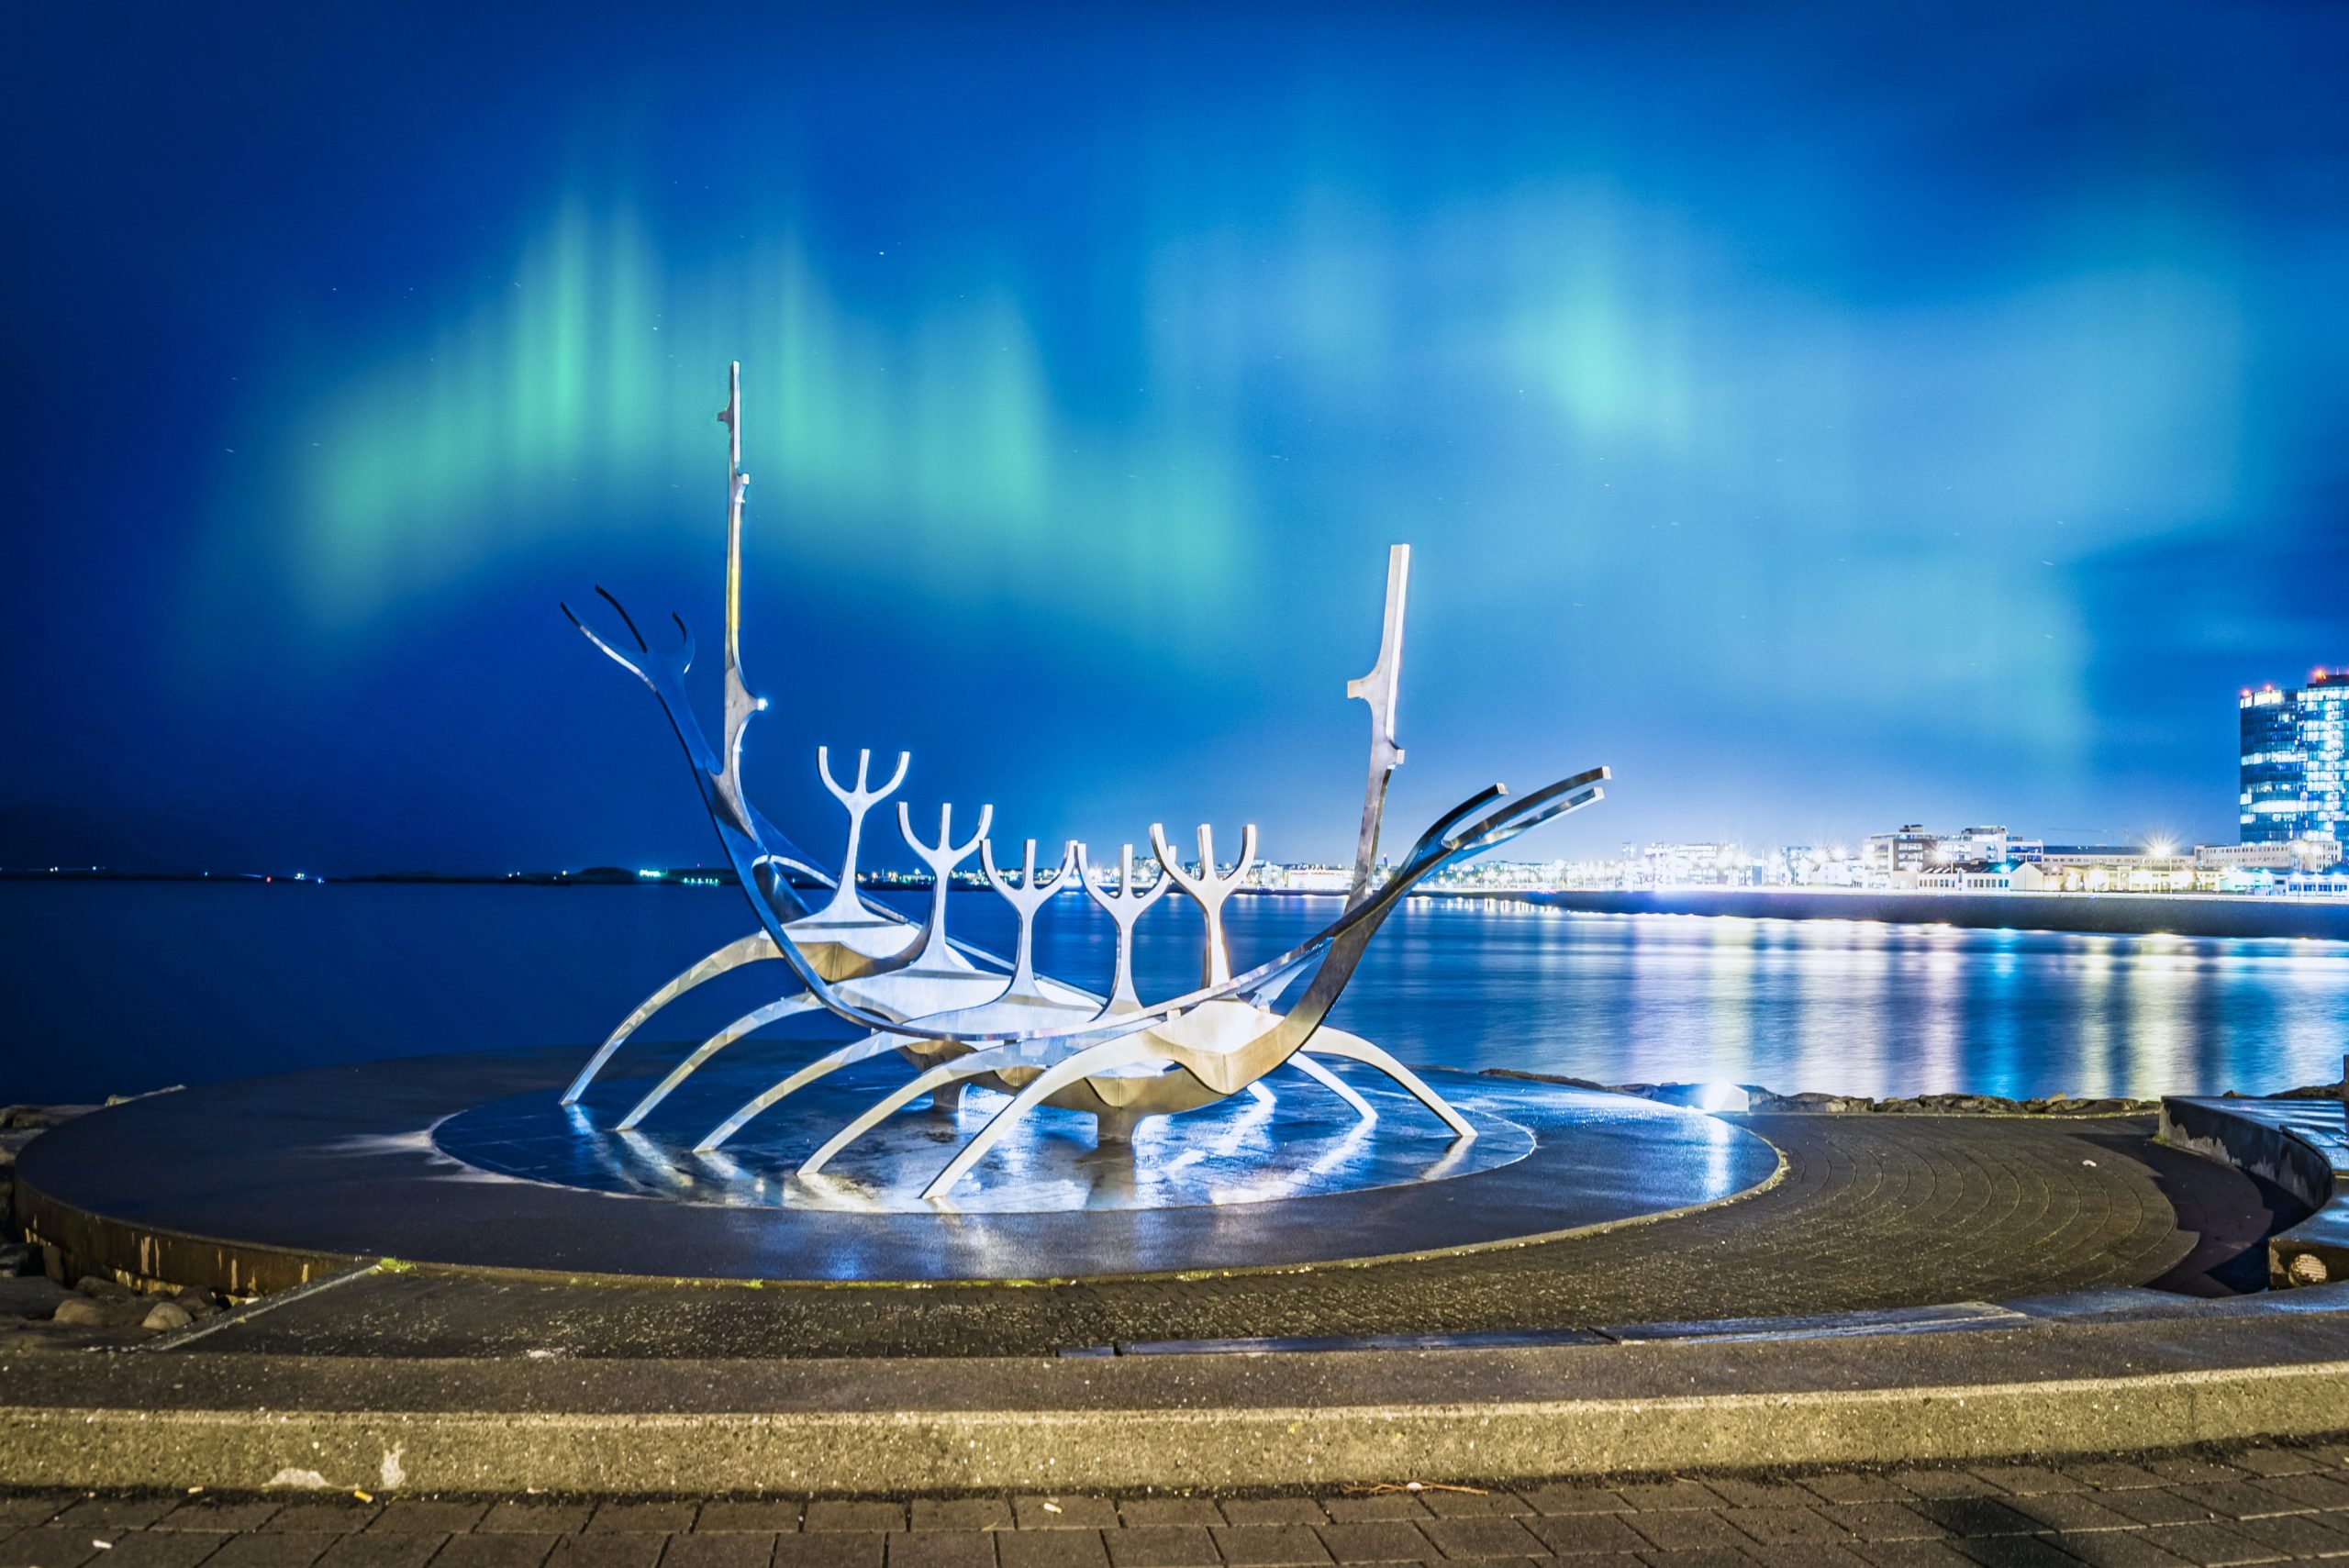
Sólfar/The Sun Voyager: Created to celebrate the 200th anniversary of the city of Reykjavik, The Sun Voyager is a sculpture crafted by Jón Gunnar Árnason.
A popular photo spot during the day, local photographers make a point to capture this stainless steel dreamboat in all seasons.
Resting right on the Sea Road path in front of Esja, you can hit three locations at once at this stop!
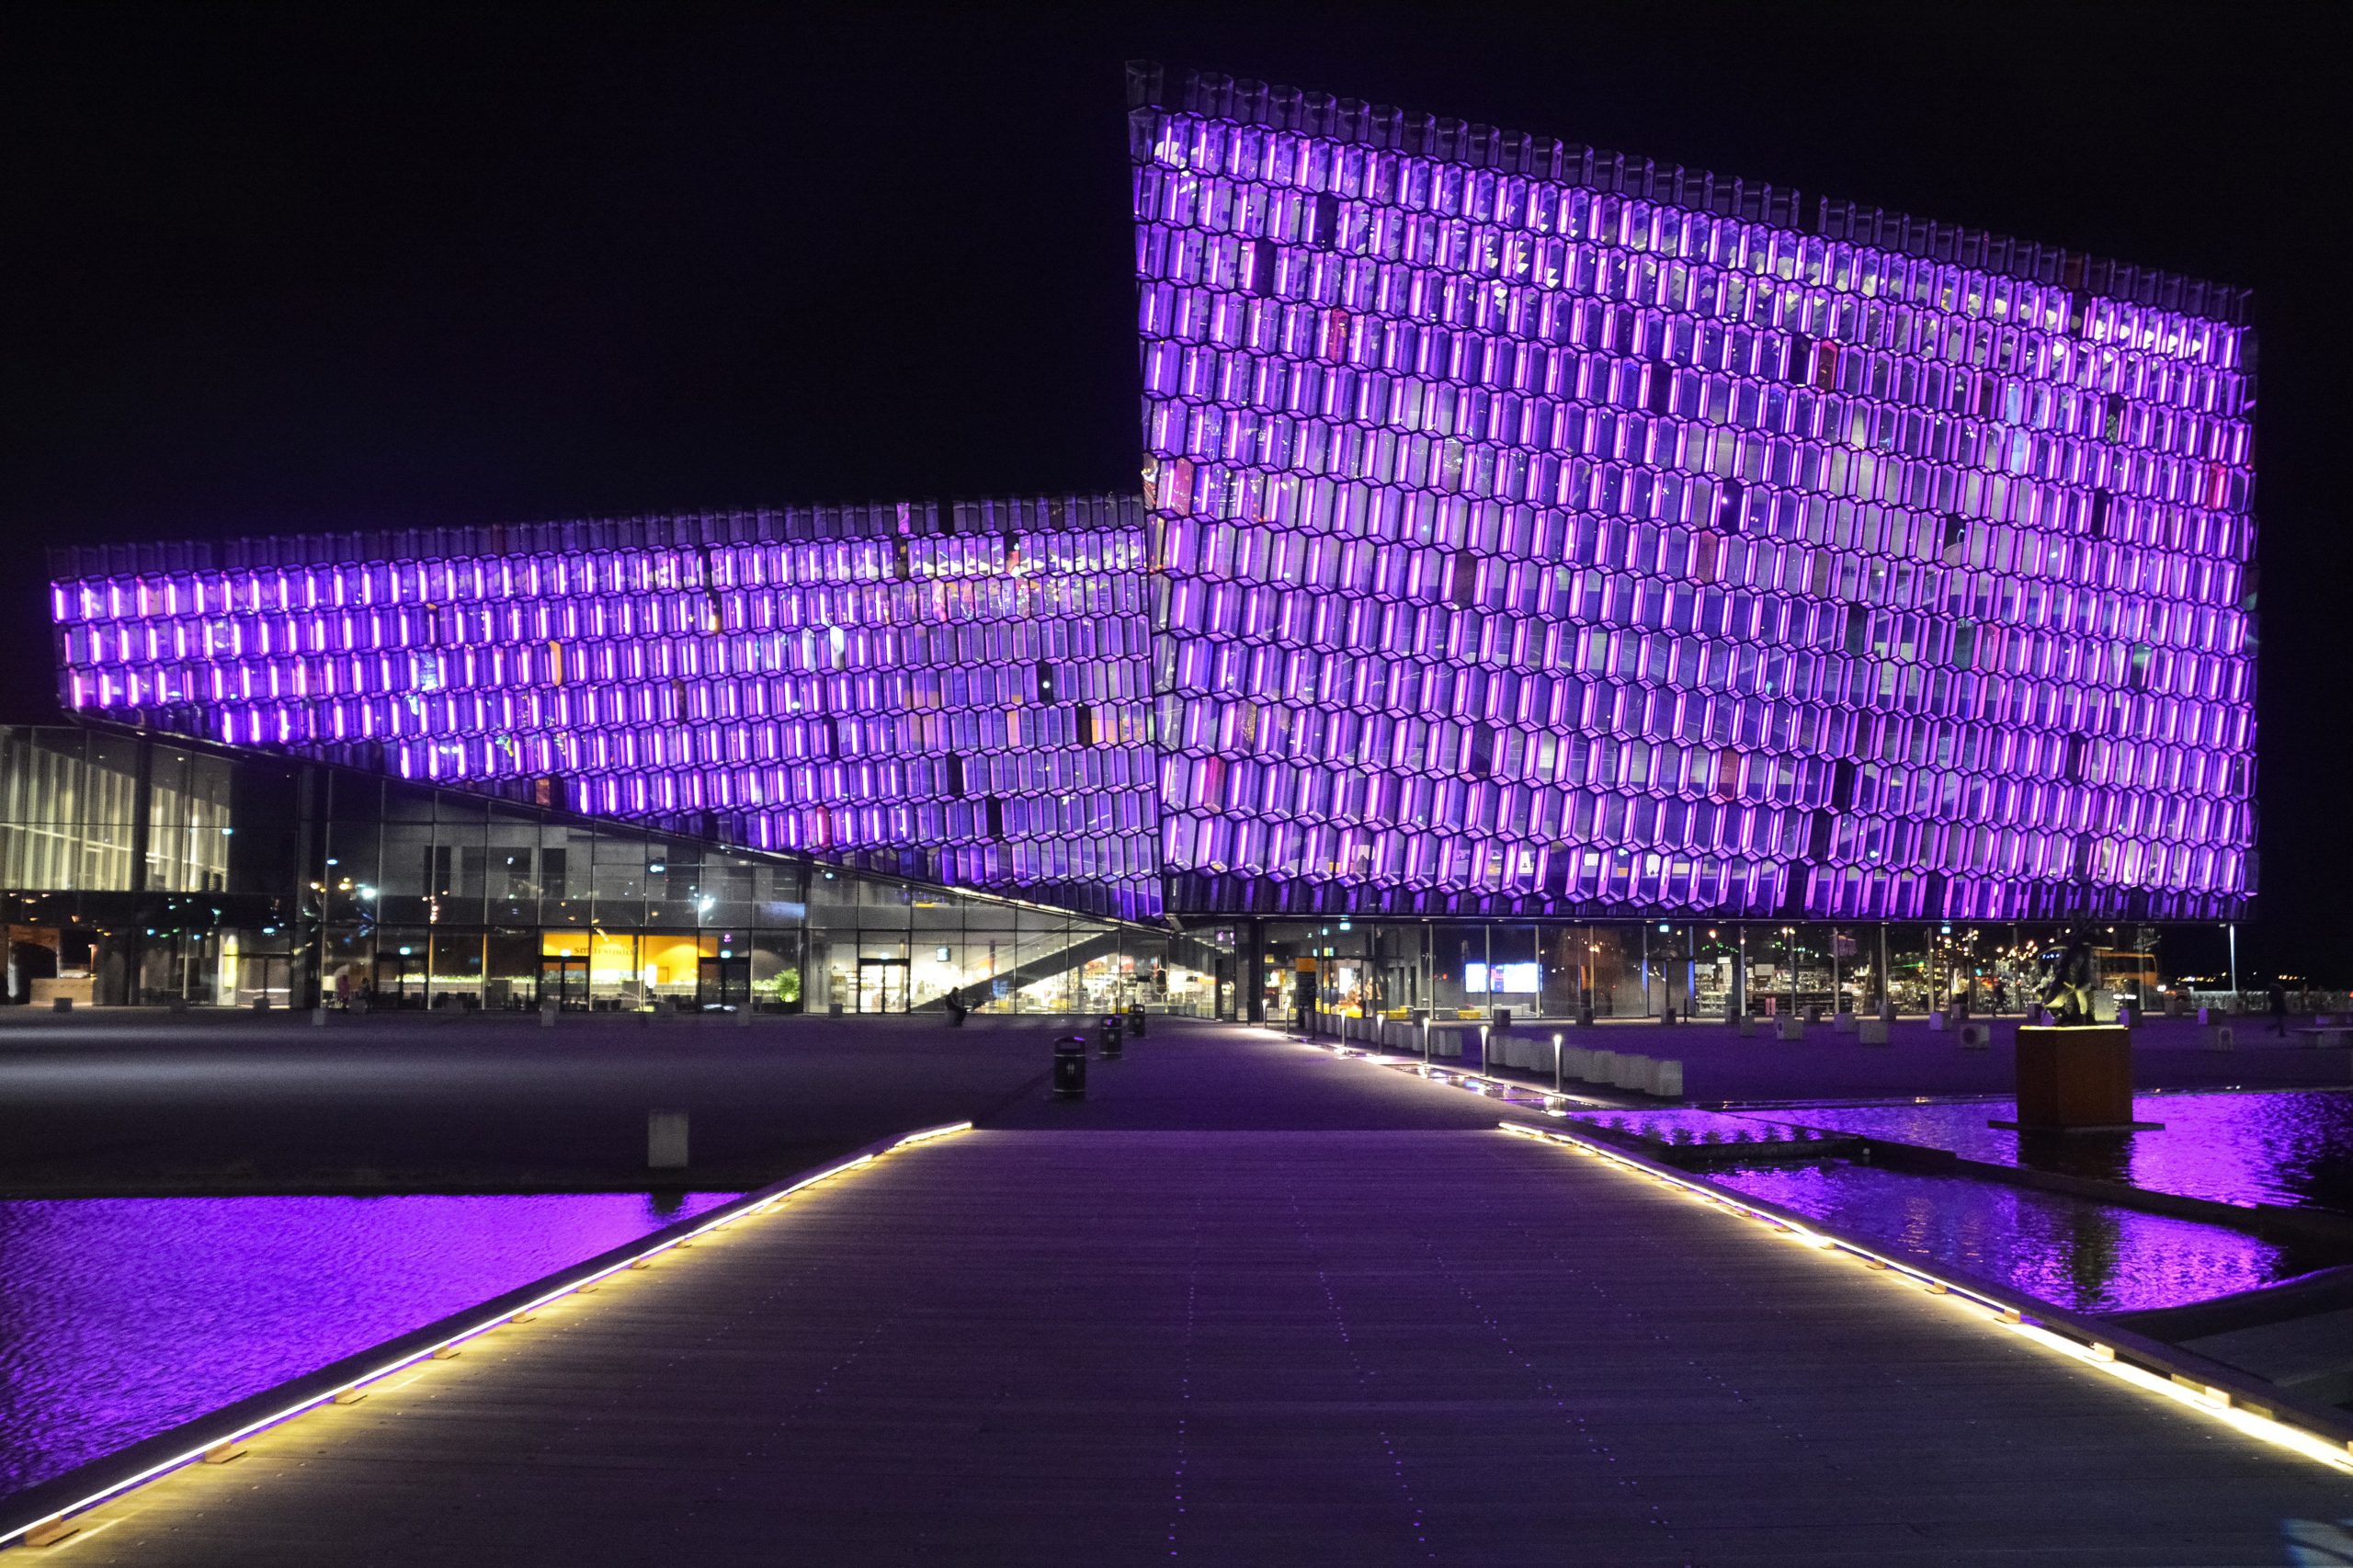
Harpa Music Hall: At the head of the Sea Road pedestrian path lies the Harpa Music Hall, a notable structure on the Reykjavik skyline. With its massive fish scale windows, Harpa lights up at night and creates animated patterns and shapes in an impromptu electric light show.
This feature is free to watch and is a great photo in and of itself.
Thufa and the Old Harbour: Thufa, also written as Þúfa, is an art installation in the Old Harbour/Grandi area. Created by Ólöf Nordal, Thufa is a reminder of Reykjavik’s maritime past.
Though it takes a bit of a walk to access, one can guarantee a modicum of serenity here at the near end of Reykjavik’s Old Harbour, jutting out into the bay.
If you head out early, check out some of the boutiques and cafes in the area.
Perlan: Perched on the top of Öskjuhlíð hill, Perlan, or, the Pearl- is a famous Reykjavik landmark that has lived many lives.
First built to house hot water, then becoming a revolving restaurant, and now hosting a vibrant museum, planetarium, and even a refrigerated ice cave- Perlan has seen it all.
This is a landmark that is popular to capture both up close and from a distance, but be sure to check their website for opening hours if you choose to visit.
Perlan is a vibrant space with many attractions, and some of these do require a ticket to enter.
Tjörnin: Tjörnin is technically a lagoon, but as you can see it has lovingly been named “The Pond”. Lying next to the city hall and many of Reykjavik’s oldest structures, a stroll around the pond is a historic pastime.
If you’re lucky and the wind is low, you can try for a great reflective photo in the shallow waters of this city treasure. Watch out for the residents though- Tjörnin’s birdlife are expert connoisseurs of bread!
A few parting tips:
Tours: Tried your luck strolling and still didn’t see any lights? Not to worry. Reykjavik is the bustling epicenter of a myriad of tour departures.
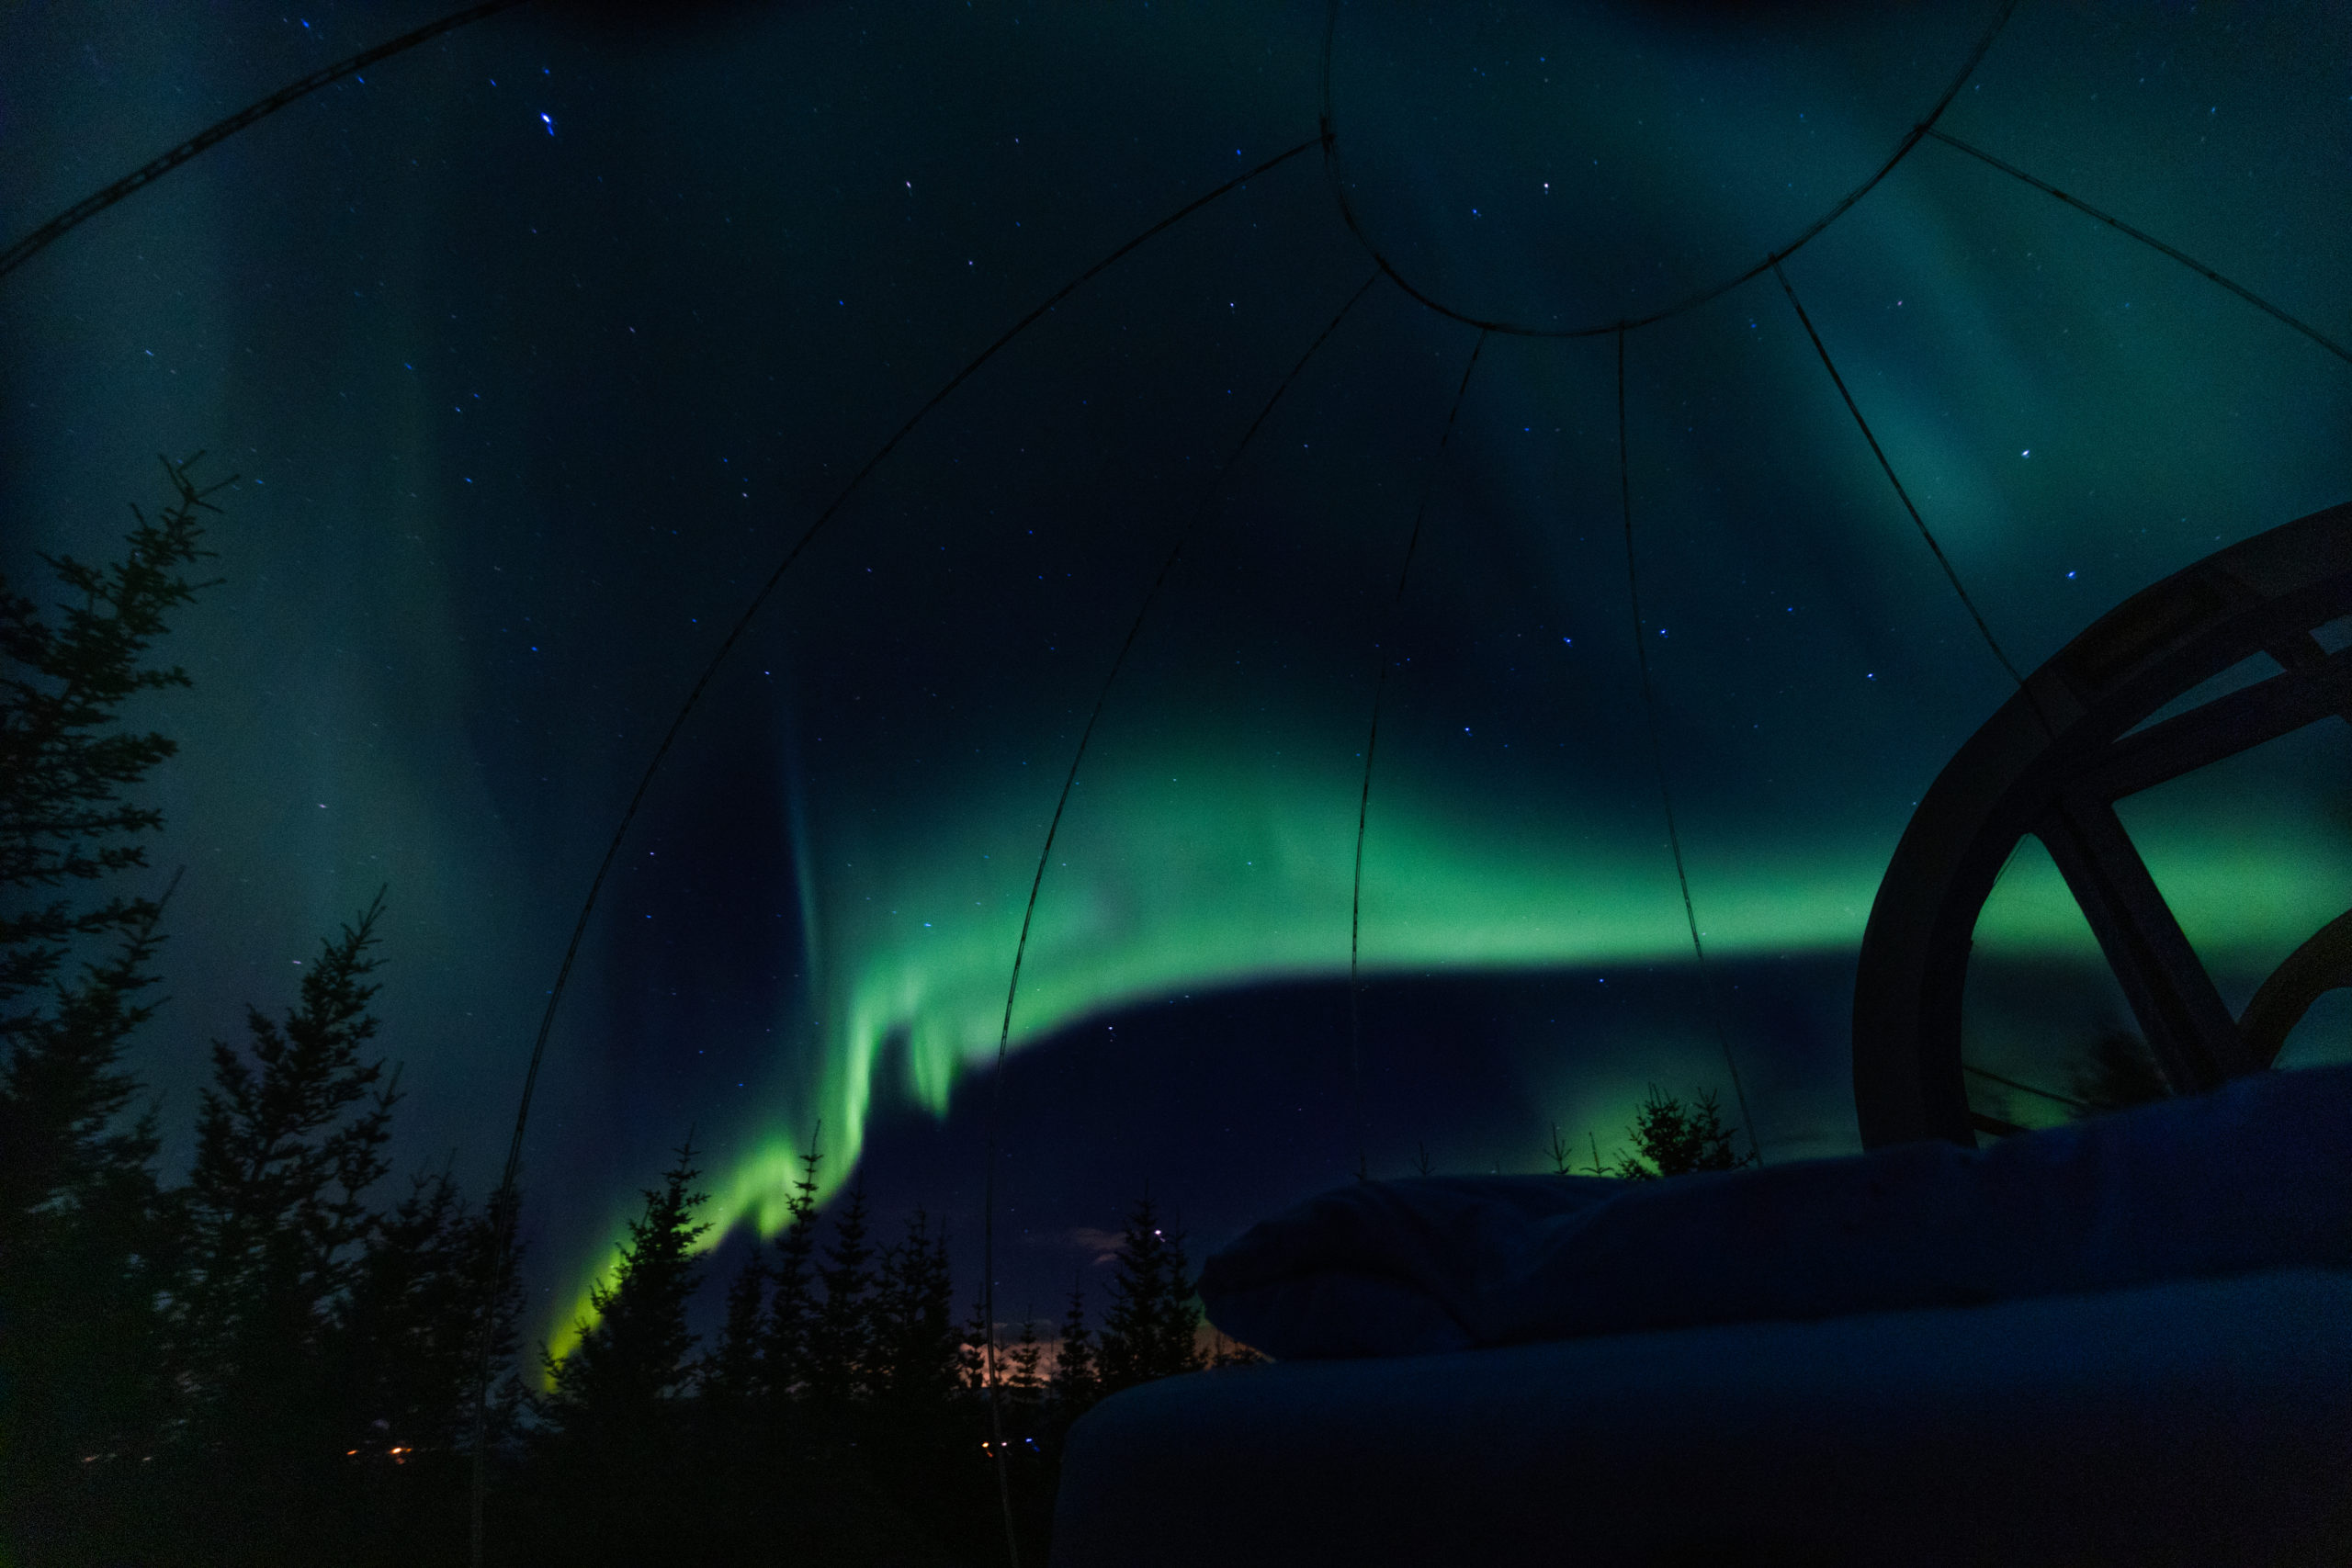
One can book all sorts of experiences that pick up in the city, from a northern lights boat ride, all the way to a chauffeured stay in a northern lights igloo. Don’t worry about the transport, you can be picked up and dropped off at your hotel, and the rest is up to the experts.
Snacks: Up late and hungry? So is half of Reykjavik! Lucky for us there are some tasty late-night options scattered through the heart of downtown. Try a stroll along Laugavegur, or stop in Ingólfstorg for some late-night eats.
If it’s close to the weekend, there may be food trucks about! The majority of them gather at Lækjartorg, but you’ll smell them before you see them. (And trust us, there is nothing like a hot cup of humarsúpa or a toasty homemade waffle in the middle of a hunt. Try finding that in the country!)
Special Surprises: Reykjavik is a bright spot on the map, but every now and then its residents want to see the lights too! In the past on high activity nights, the city has been known to dim the glow just a bit, to help out.
Don’t bet on this happening often, as it is a very special occurrence that takes quite a bit of permission to achieve- but know that you’re in good company when looking up!
(And cross your fingers that you get to experience one of these events! The excitement in town is palpable on a night when Reykjavik goes dark.)
Got wheels?: So you’ve found yourself a ride and you’re looking for a spot. Don’t forget to check the northern lights forecast for clear spots in the sky before you do it!
Once you’ve had a look, you’ve got a huge spectrum of choices in front of you. Just within an hour’s radius from town, you’ve got the entire Reykjanes peninsula, all the way out going south to just a bit past Selfoss, the national park Thingvellir, and even the route 1 going north all the way up to Borgarnes.
All of these spots are reasonably accessible and within an hour. Good luck, and happy hunting!